Learning how to make Reels on Instagram is more necessary than ever. In fact, 79% of users have made a product or service purchase after watching a Reel, so it’s almost certain that your target audience is somewhere in that group.
Stay tuned as we deconstruct the process of creating Instagram Reels and offer all the tips you need to gain more Instagram views, attract new followers and build a successful business platform for your brand.
Let’s get started!
We’re SocialBee LABS SRL, part of WebPros. We use the information you provide to share relevant content and product updates, as outlined in our Privacy Policy. You can opt out anytime.
Short summary
- Instagram Reels are short, vertical videos (15 seconds to 3 minutes if recorded in the app, up to 15 minutes if uploaded) that showcase entertaining or educational content and are easy to discover and share.
- It’s recommended to keep videos under 90 seconds for better algorithm performance.
- Creating Instagram Reels helps you reach new audiences, gain followers through engaging content, and boost conversions by showcasing your products effectively.
- Create an Instagram Reel in five steps: record or upload a video, add trending audio, apply effects, adjust settings, and share it.
- Use third-party tools like SocialBee, VideoScribe, and Canva to efficiently plan, create, and schedule Instagram posts with ease.
- Make Instagram Reels that flow smoothly by keeping the lighting consistent, picking audio that loops well, and using transitions to connect the start and end of your video.
- Join Instagram trends to boost your exposure by using trending audio, hashtags, and video structures that are popular at the moment.
- Use the remix feature to add your twist to other creators’ Reels. This encourages engagement and sparks fresh content ideas.
- Repurpose your existing videos, Stories, and highlights into Instagram Reels by editing and customizing them, or convert your Story highlights into Reels with just a few taps.
- Use evergreen videos in your content strategy by scheduling them to repost regularly, and diversify your content with different topics using SocialBee’s content categories.
- Adding text to your Reels helps highlight key points, increases engagement from users who watch without sound, and makes your content more accessible to everyone.
- Make your Reels shoppable by adding product tags to your videos, turning views into sales while still keeping your content interesting and informative.
What are Instagram Reels?
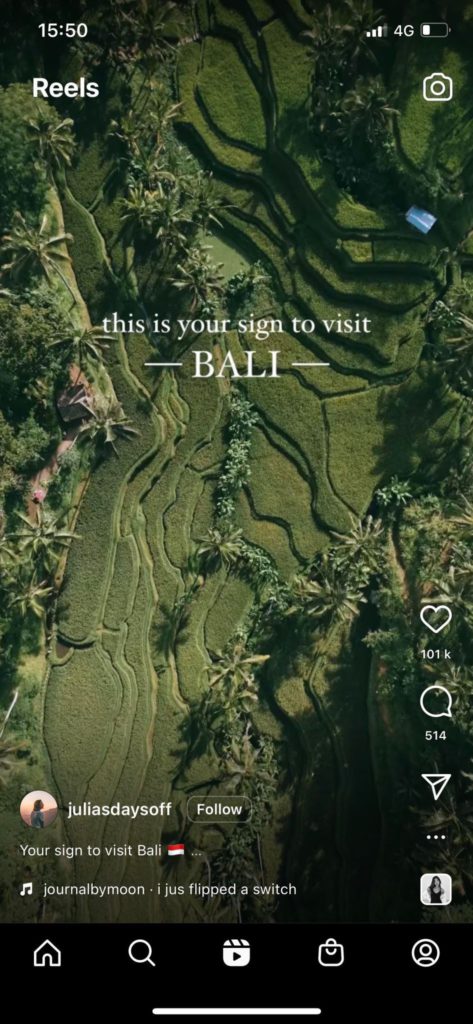
Instagram Reels are easily-discoverable short videos used to share entertaining, educational, or inspirational content on the app. They are displayed on a scrollable feed in a vertical format, which makes them easy to “consume.”
Instagram Reels can be between 15 seconds to 3 minutes if created in the app, or up to 15 minutes long if uploaded. They can also be shared as Stories or normal feed posts.
How to make a longer Reel on Instagram
To upload longer videos to your account you will have to create them externally and add them to Instagram. Instagram Reels allows you to record with a video length of either 15, 30, 60, seconds or 3 minutes. If you want to create your Reel directly in the Instagram app, you won’t be able to exceed the 3 minute limit.
While any video of up to 15 minutes can be uploaded as a Reel, Adam Mosseri, Instagram’s CEO, has warned that anything over 90 seconds hurts the post’s performance, as it won’t be favored by the algorithm. While you might have more to say than one minute and a half allows, consider the pros and cons before you post longer videos.
Why should you create Instagram Reels?
Similar to TikTok’s content-sharing algorithm, the videos that get posted on Instagram Reels go beyond your existing audience. This opens new opportunities for you to reach your potential customers faster and easier than ever before.
Here are the three main benefits of posting Instagram Reels:
- Generate more exposure – Posting Reels will help you reach users who don’t follow your Instagram account and expose your brand to a whole new target market.
- Gain new followers – Spending time producing entertaining videos pays off. People will see you as a source of valuable content and follow your account to make sure they don’t miss out on your new Instagram posts.
- Boost conversions – Products often go viral and sell out when content creators bring them into the spotlight. Planning content that highlights useful features, presents undeniable results and focuses on your unique selling proposition will increase your chances of becoming the next Instagram sensation.
How to create Reels in 5 steps
How many steps does it take to make a Reel? By our calculations, only five.
Here is the step-by-step process of creating an Instagram Reel:
- Record or upload a video.
- Choose a trending audio from Instagram’s music library.
- Add creative effects.
- Adjust speed, layout, and time.
- Share your Instagram reel.
1. Record or upload a video
Do you already have an Instagram Reel idea? Don’t let it slide. Instagram offers you all the creative tools you need to create high-performing videos without too much trouble.
Let’s go through all the ways you can start creating a new Reel on Instagram!
A. How to create an Instagram Reel from the Reels tab:
- Open the Instagram mobile app.
- Click on the Reels icon at the bottom of your screen.
- Click on the camera icon from the top right corner.
- If you already have a video, tap on the gallery icon on the bottom left side and upload.
- If you want to create a video, tap and hold the record button to film your Reel.
- Add any finishing edits you might need and share your video.
B. How to create Reels from the Instagram home screen
- Open the Instagram app.
- Tap on the plus sign at the bottom center of your screen.
- Choose the Reels option from the bottom-right corner.
- If you already have a video, tap on the gallery icon on the bottom left side and upload.
- If you want to create a video, tap and hold the record button to film your Reel.
- Add any finishing edits you might need and share your Instagram video post.
C. How to create a Reel from the Instagram Stories camera
- Open the Instagram app.
- Access your Instagram Stories camera.
- Choose the Reels option from the bottom of the screen.
- If you already have a video, tap on the gallery icon on the bottom left side and upload.
- If you want to create a video, tap and hold the record button to film your Reel.
- Add any finishing edits you might need and share your video.
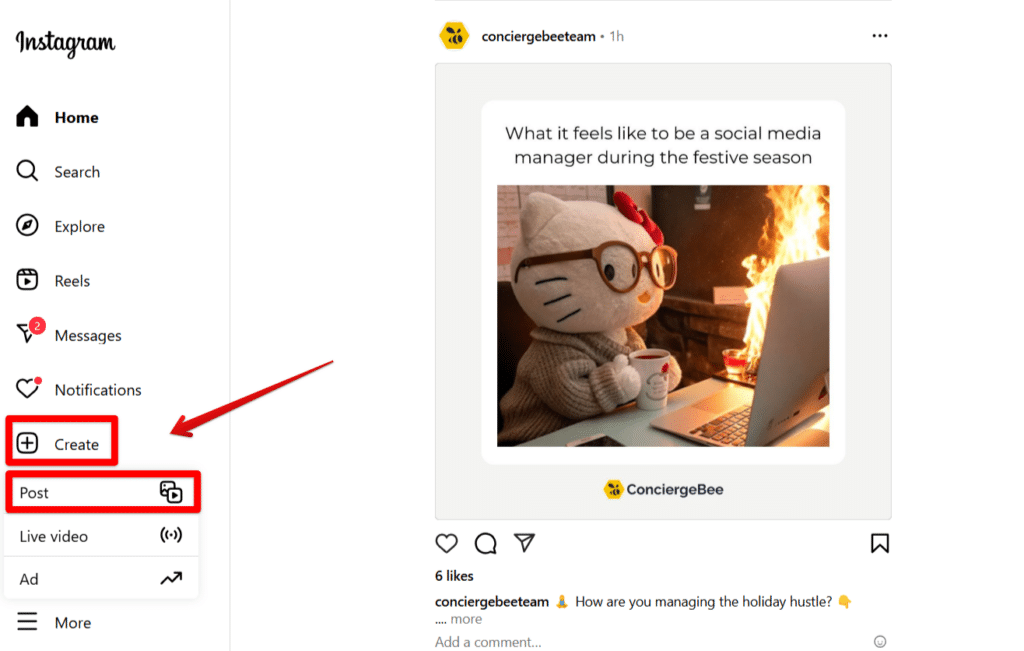
D. How to create a Reel on Instagram on laptop
- Open Instagram.com in your browser.
- Click on “Create” and then “Post” on the menu on the left.
- Upload a video from your laptop.
- Edit it, write a caption and share.
Instagram automatically detects whether what you uploaded should be shared as only a feed post or also a Reel based on video duration and format.
2. Choose a trending audio from Instagram’s music library
Unless you want to keep your own original audio with the video, you don’t want to skip this step.
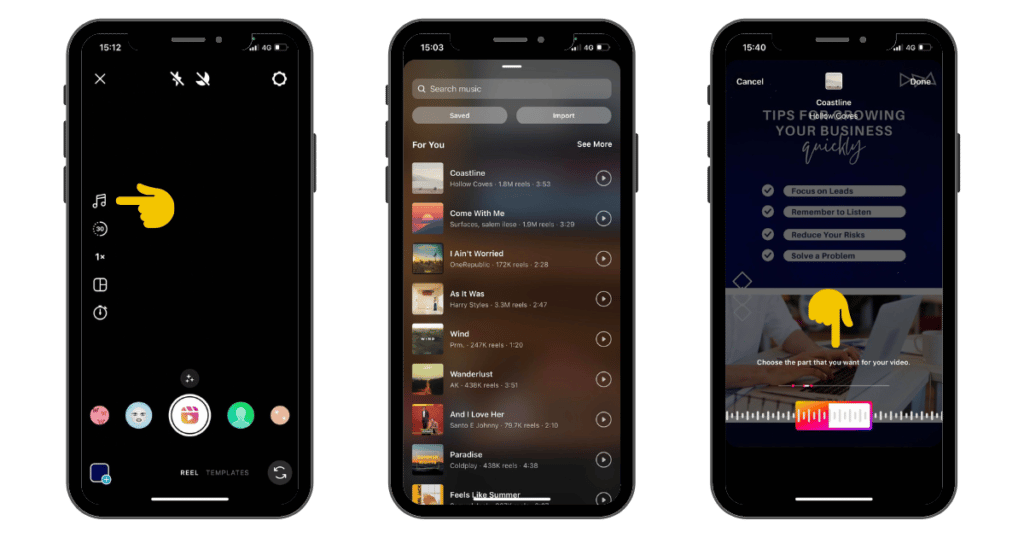
Here is how you can add music to your video:
- Open your Instagram camera to create your Reel.
- Tap on the music note icon on the left side of your screen to open the Instagram music library.
- Search for the audio you would like to use and select it.
- Adjust the part of the audio you would like to include in your clip.
If you forgot to add an audio file before filming, you can also do this during the editing process. Here you will also have the option to record a voiceover for your video.
Adding music to your video can really tie your whole concept together and keep your viewers engaged. You can keep the original video’s audio and add some background music to make it more dynamic or eliminate any dead air that might have occurred during filming.
Another relevant thing to keep in mind is that Instagram users can use other people’s original audio files. Usually, the creator sounds that gain attention from other users are the ones that have a transformative quality to them. They can become a way to tell a story or add humor to a video.
For instance, an audio of a quirky laugh can make a funny video clip more hilarious, or a snippet of a motivational speech can turn an aesthetic video montage into an inspirational clip.
How to make a Reel with photos and music on Instagram
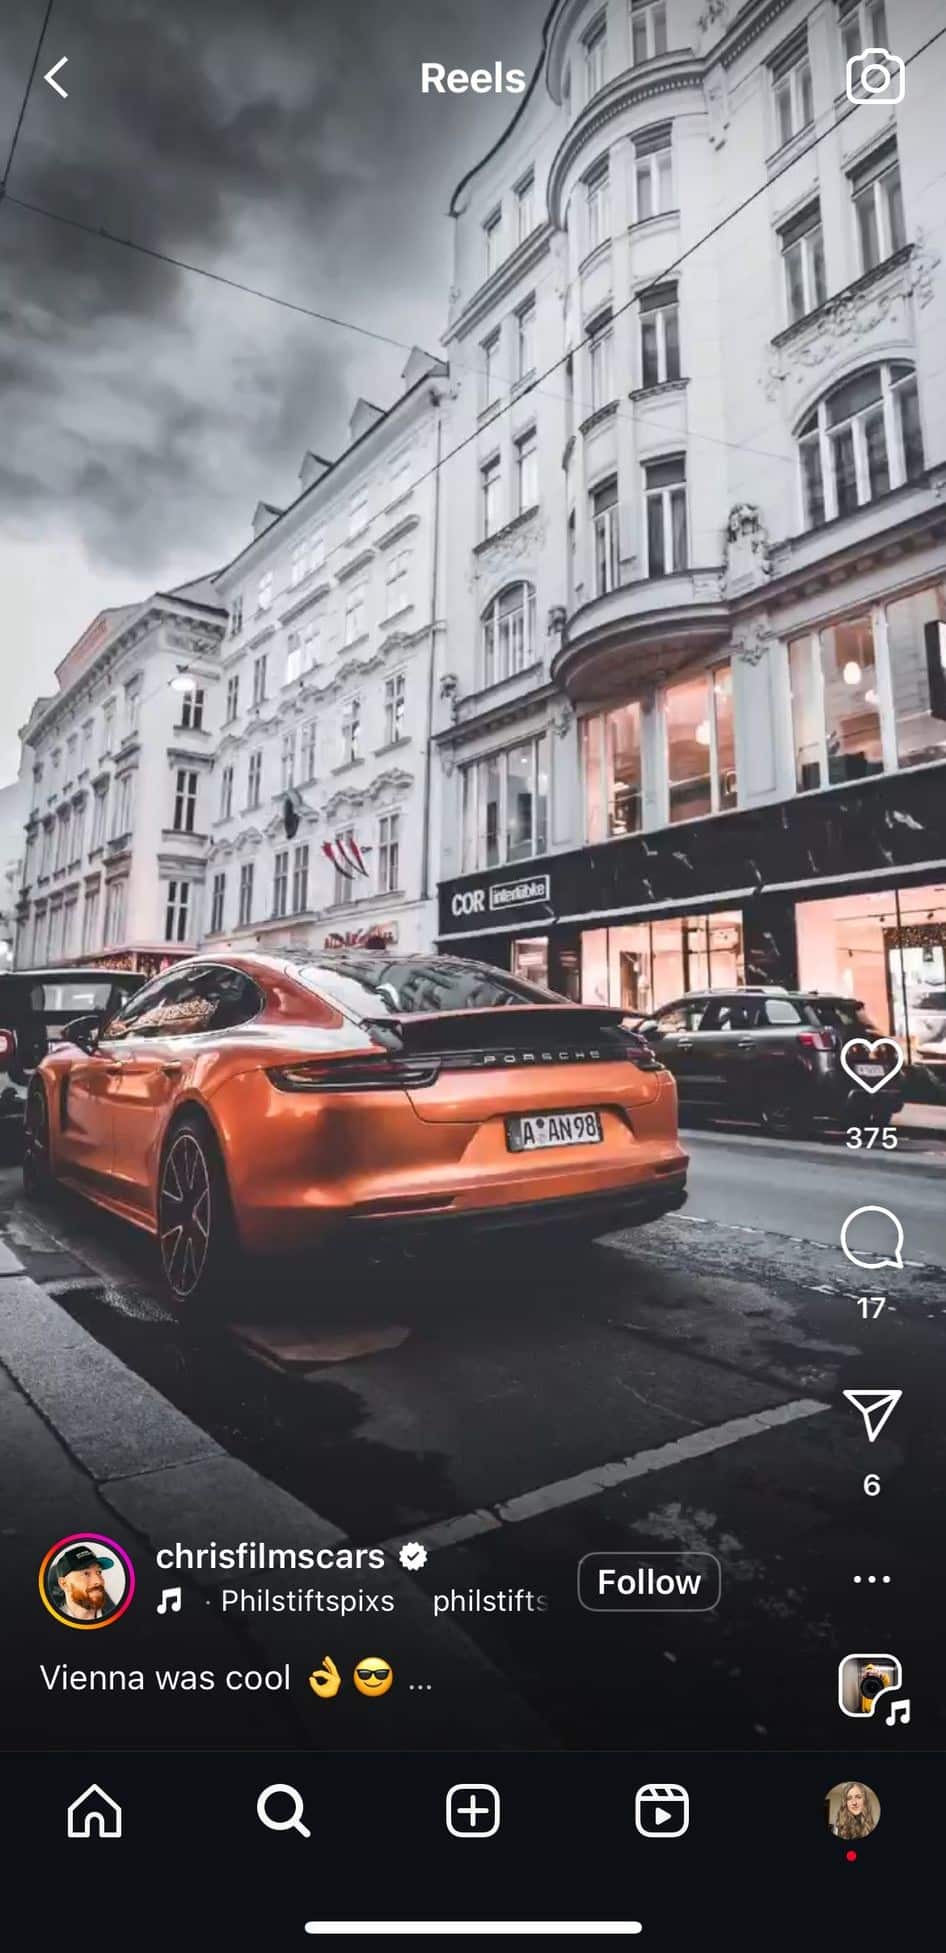
Another great use of Instagram audios is when you want to create a carousel Reel. This is like an Instagram carousel post, but with the added benefit of music and transitions. Pair the right song with your photos so your slideshow will tell a story and engage the audience.
Take this example from @chrisfilmscars who compiled his travel images from Vienna
Here is how to make a slideshow Reel on Instagram:
- Open the Instagram app.
- Create a new Reel post.
- Open your camera roll and select up to 50 photos.
- Next, you can choose one of the suggested audios or search for your preferred one.
- Add the final touches and share your slideshow.
You can also make a Reel with multiple videos this way.
3. Add creative effects
This app has an impressive arsenal of creative tools that are enough to make your Instagram videos stand out.
Here are the Instagram effects you can use to edit your reel:
- Filters: Use trending filters to make your videos more relevant for your audience.
- Stickers: Add gifs, animations, and polls to increase interactions.
- Drawing on top of videos: Make your Reel unique by drawing over your video, either to highlight something or just to show off your natural drawing ability.
- Sound effects: Add sound effects to emphasize the point of your video. Let’s say you told a joke. It’s the perfect occasion to add a drum sound that leads up to a punchline.
- Templates: Instagram has a set of templates that allow you to make a professional Reel without even editing the video. Just upload multiple clips and images to make a quick video collage with already-added filters and effects.
How to make Reels on Instagram with effects
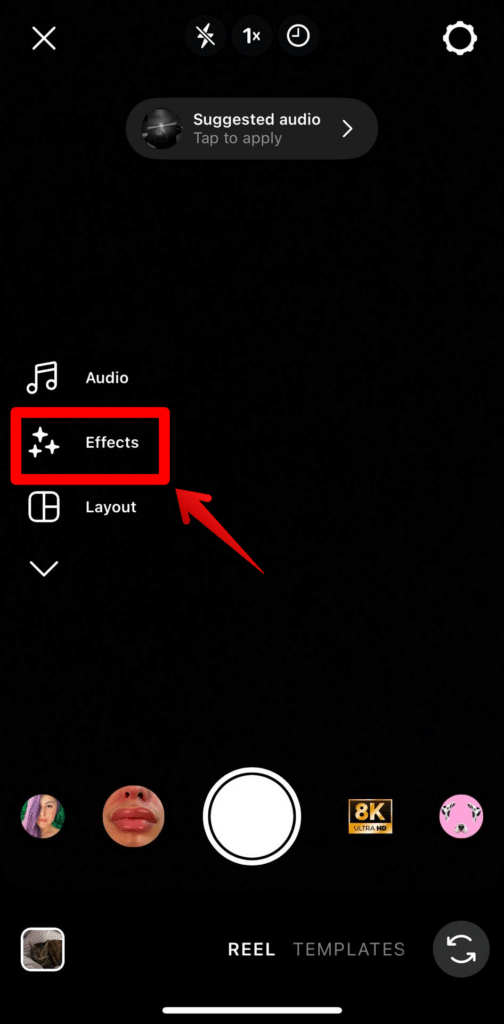
You can add effects to your Instagram Reels by simply opening your Instagram camera and tapping on “Effects” on the left side of your screen.
You will be able to browse through Instagram’s effects library or search for something specific you have in mind. Effects can either be added before you start filming your Reel or after you’ve already recorded it.
How to make a green screen Reel on Instagram
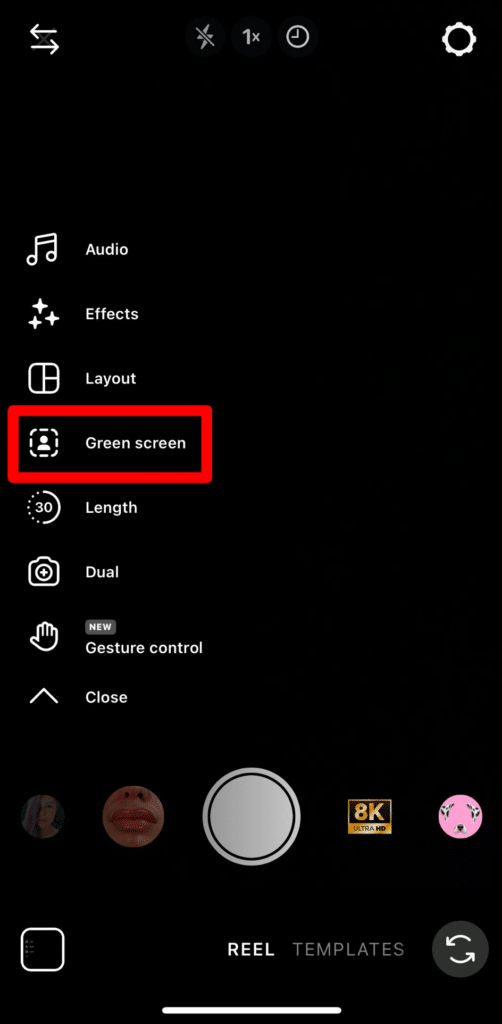
In the menu where you find effects, you will also notice the green screen effect.
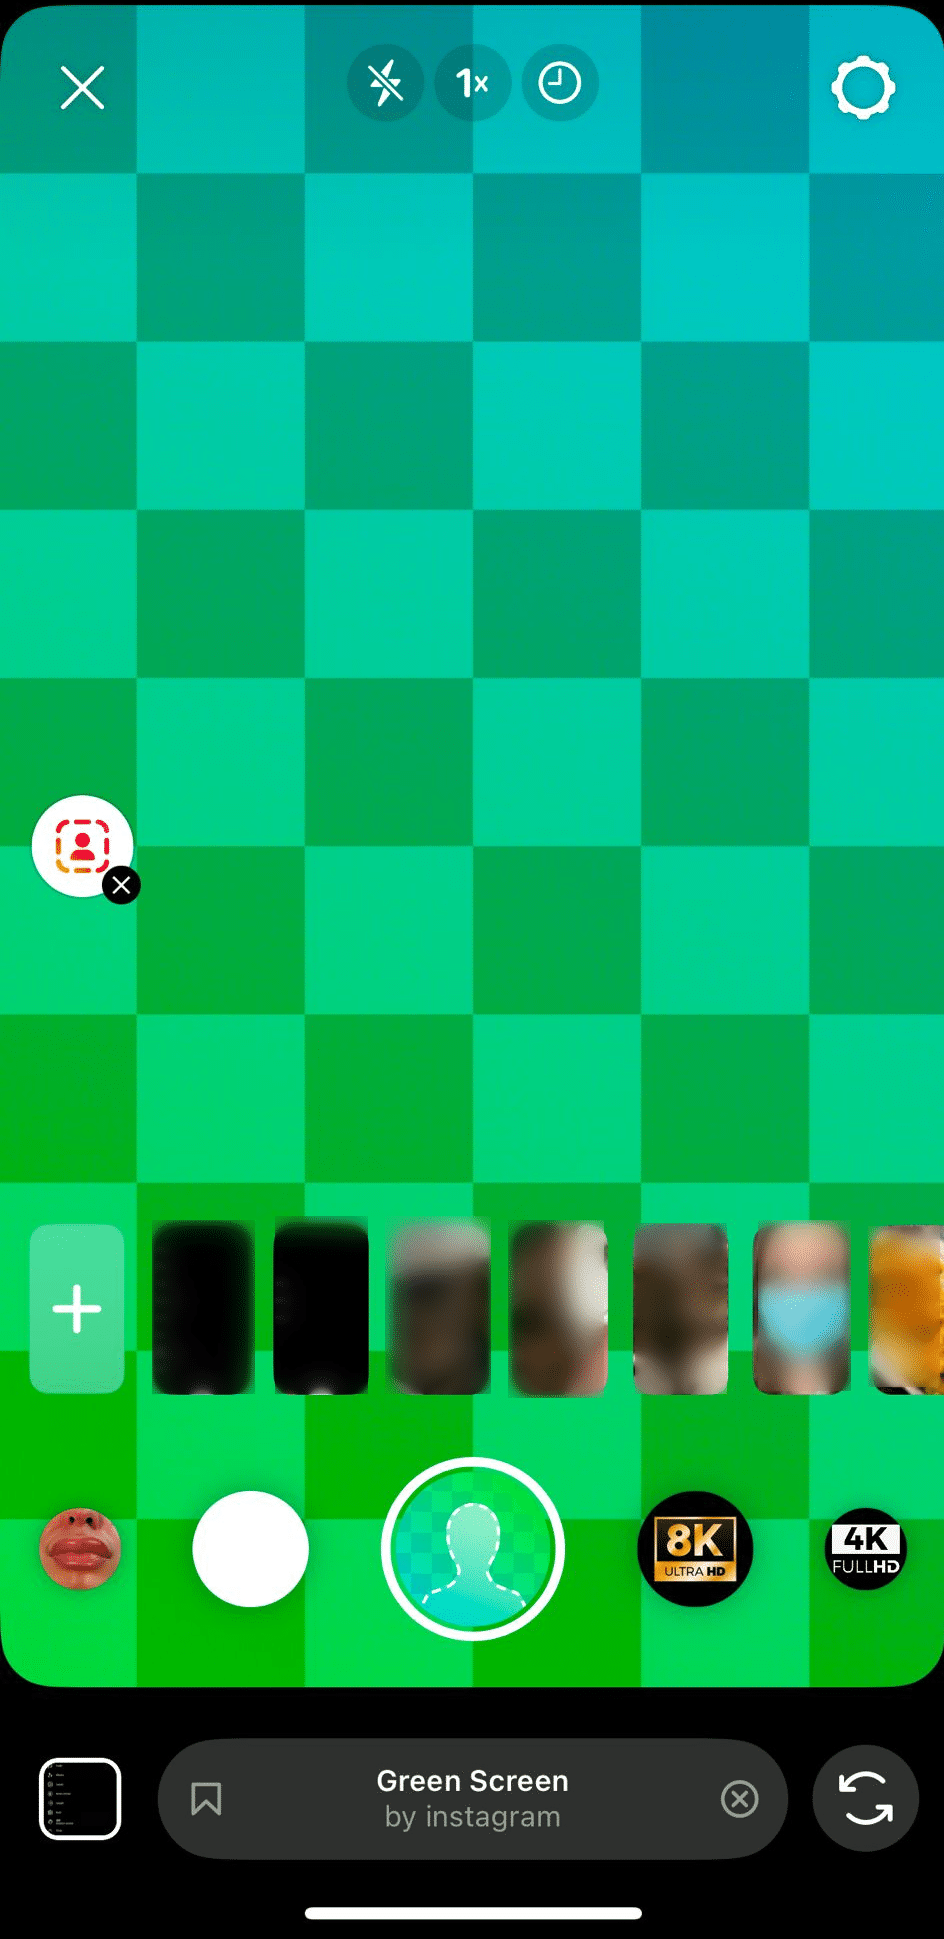
This will allow you to add a background image to your video and record yourself (or something else) over it. Simply select a photo from your camera roll and then tap and hold to film with your green screen background.
People usually use the green screen filter to create commentary or explainer videos. You can point to things in the photo and better get your point across, like a teacher with a whiteboard.
4. Adjust speed, layout, and time
Besides filters, stickers, and audio files, some more editing tools can help you make better IG Reels in no time: speed, layout, and time.
Do you want to create a time-lapse? Maybe you have a lot more to say and the time limit is too restricting. The solution is to adjust your video speed to fit your needs. A faster or slower pace can totally change the energy and feel of your video.
Furthermore, the layout feature is a tool unique to Instagram that allows users to film multiple frames and show them all at once under the umbrella of the same Reel. This is great if you want to make your viewers stick around and rewatch the video until they see all the different shots.
Last, but not least, the Instagram timer lets you film your Reel video without having the awkward initial moment of fixing your camera before you get in the right frame or pose. Set your timer, prepare for the start of the video, and become the Taika Waititi of Reel directing.
5. Share your Instagram Reel
After all that filming and editing, here comes the moment when you can share your hard work with your Instagram followers.
The trick here is to get the timing right. Those first few hours your Reel is up can decide the fate of your video. Let’s break things down!
When you are creating a Reel, you have a specific target audience in mind that will view and engage with your content. So, take a moment to identify their schedule. When are they online and scrolling away through Instagram Reels?
Why do you have to know this? Because you have to make sure that as soon as you drop your video, there are people from your target audience ready to engage with it.
The solution? Content scheduling. Upload Reels to SocialBee, select Instagram as your platform of choice, pick the date and time, and you are all set.
How to make a whole Reel play on Instagram Story
Instagram Stories have a limit of 60 seconds for videos, so you need to keep your Reel under a minute long for it to play fully on your Story. By sharing your Reel on your Story you increase its reach to an even larger audience from your following who might miss the post on their feed.
Here is how you can share your Reel on Instagram Story:
- Open the Reel you want to share.
- Tap on the paper plane on the right side of your screen.
- Select “Add to Story”.
- Customize with text, stickers, or other Story elements if you wish.
- Share on your Story.
How to get more views and engagement on your Instagram Reels
Now that you know the basics about Instagram video creation, it’s time to get into the tips and tricks side of the article.
Here are seven ways to get more views on your Instagram Reels:
- Use third-party tools
- Create seamless transitions
- Hop on trends
- Remix other Reels
- Recycle your Instagram Stories and existing video clips
- Add timed text to Reels
- Make Reels shoppable
Let’s learn more about each step!
1. Use third-party tools
Using third-party tools allows you to generate more Instagram engagement in less time. Finding the right mix will help you plan, create, and post your content in an optimal way.
First on our list…
SocialBee
As previously mentioned, timing is crucial for Instagram Reels. Scheduling your video posts ahead of time and adding a bit of strategy to your content planning can work wonders.
But how can you make the process more efficient and less time-consuming? After all, you are not always on social media, ready to share content. Easy, by using SocialBee.
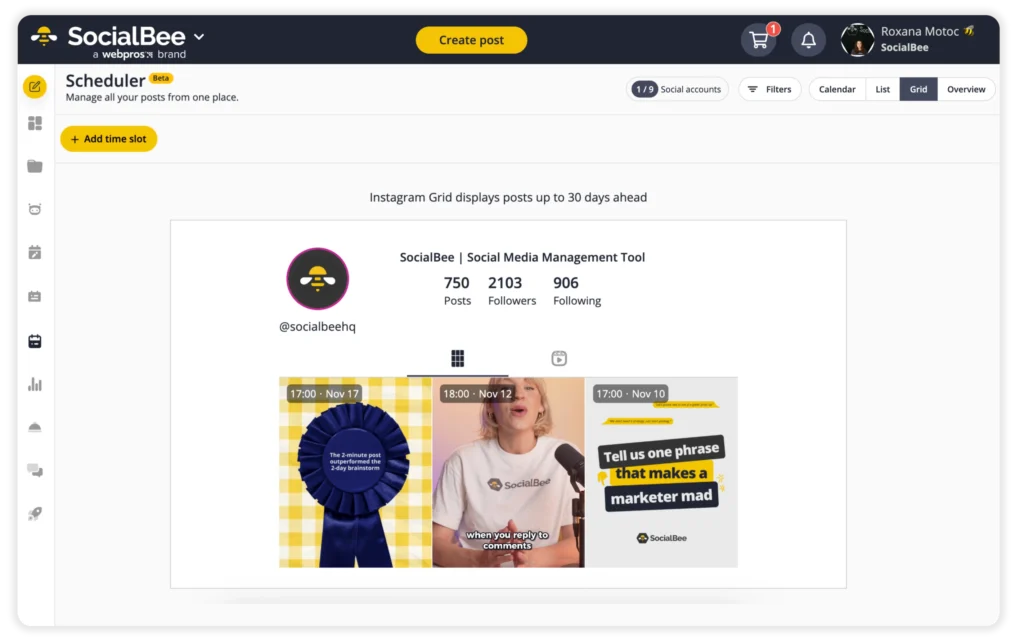
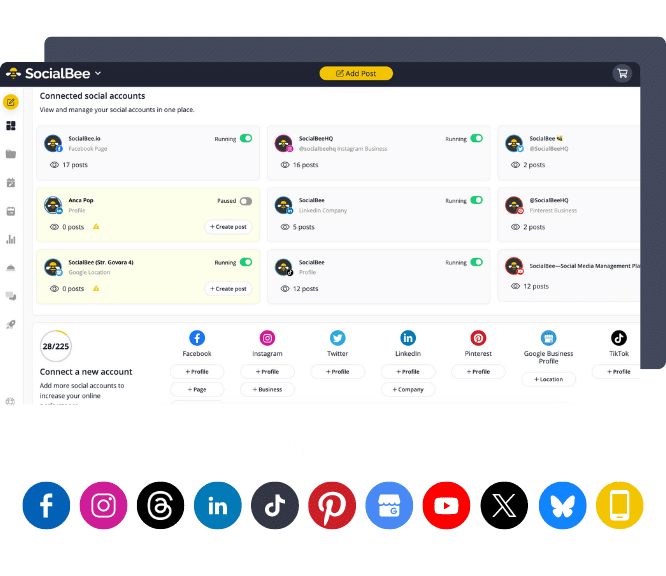
Create, schedule, and share all your social media video posts across all your accounts from one dashboard. You can even customize your posts to fit Instagram’s content requirements and schedule anything from carousels to Reels and Stories.
Plan your Instagram content ahead of time from a third-party app
—post images, videos, carousels, Stories, and Reels with ease from SocialBee.
Start your 14-day free trial today!
And that’s not all, with SocialBee you can automatically generate hashtags for your Instagram posts to make sure you get your Reels on the right user feeds. You can save all your hashtags in collections and add them to your content with a couple of clicks when it’s time to share a new post.
VideoScribe
If you want to make your Instagram Reels stand out from the crowd, VideoScribe is the best tool for you!
Best known for its iconic hand-drawn animation style, VideoScribe is an easy-to-use, drag-and-drop animation tool.
Whether you’re brand new to animation or a serious video professional, you can create animated videos in minutes. This means your social posts get made faster, and your audience gets to experience your content sooner.
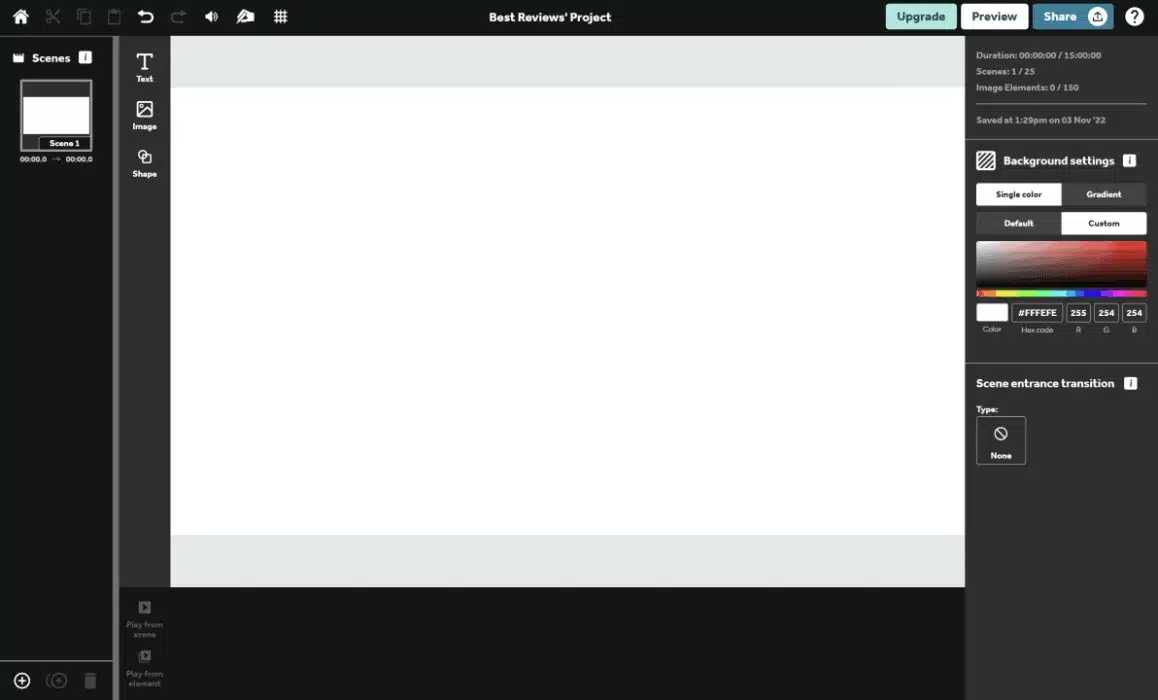
Use templates or start from scratch to create engaging Reels by adding hand-drawn animations, classic fades, move-in effects, appear transitions, and draw effects to your elements and illustrations.
Plus, with VideoScribe, you have the option to create your videos in the downloadable desktop app (that also works offline) or kick back in your favorite browser on desktop or tablet.
Canva
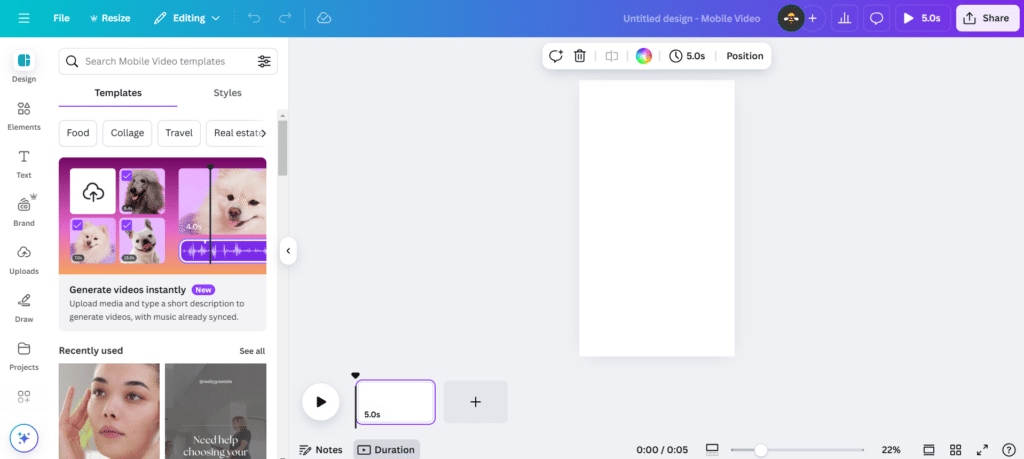
Canva is not only an accommodating design tool for beginners, but also an amazing help when it comes to video editing.
This online platform offers templates for your Instagram feed posts, Stories, and even Reels you can easily customize for your brand. It has plenty of free stock clips, audio files, images, and more.
2. Create seamless transitions
Something that differentiates a good Reel from a bad one is the transitions you use. A choppy video is hard to follow and can have people losing interest fast. When the video flows nicely, it gives a more professional impression and keeps viewers invested until the end.
Looping videos can hold viewers engaged even after the video has technically finished.
How to make a Reel loop on Instagram
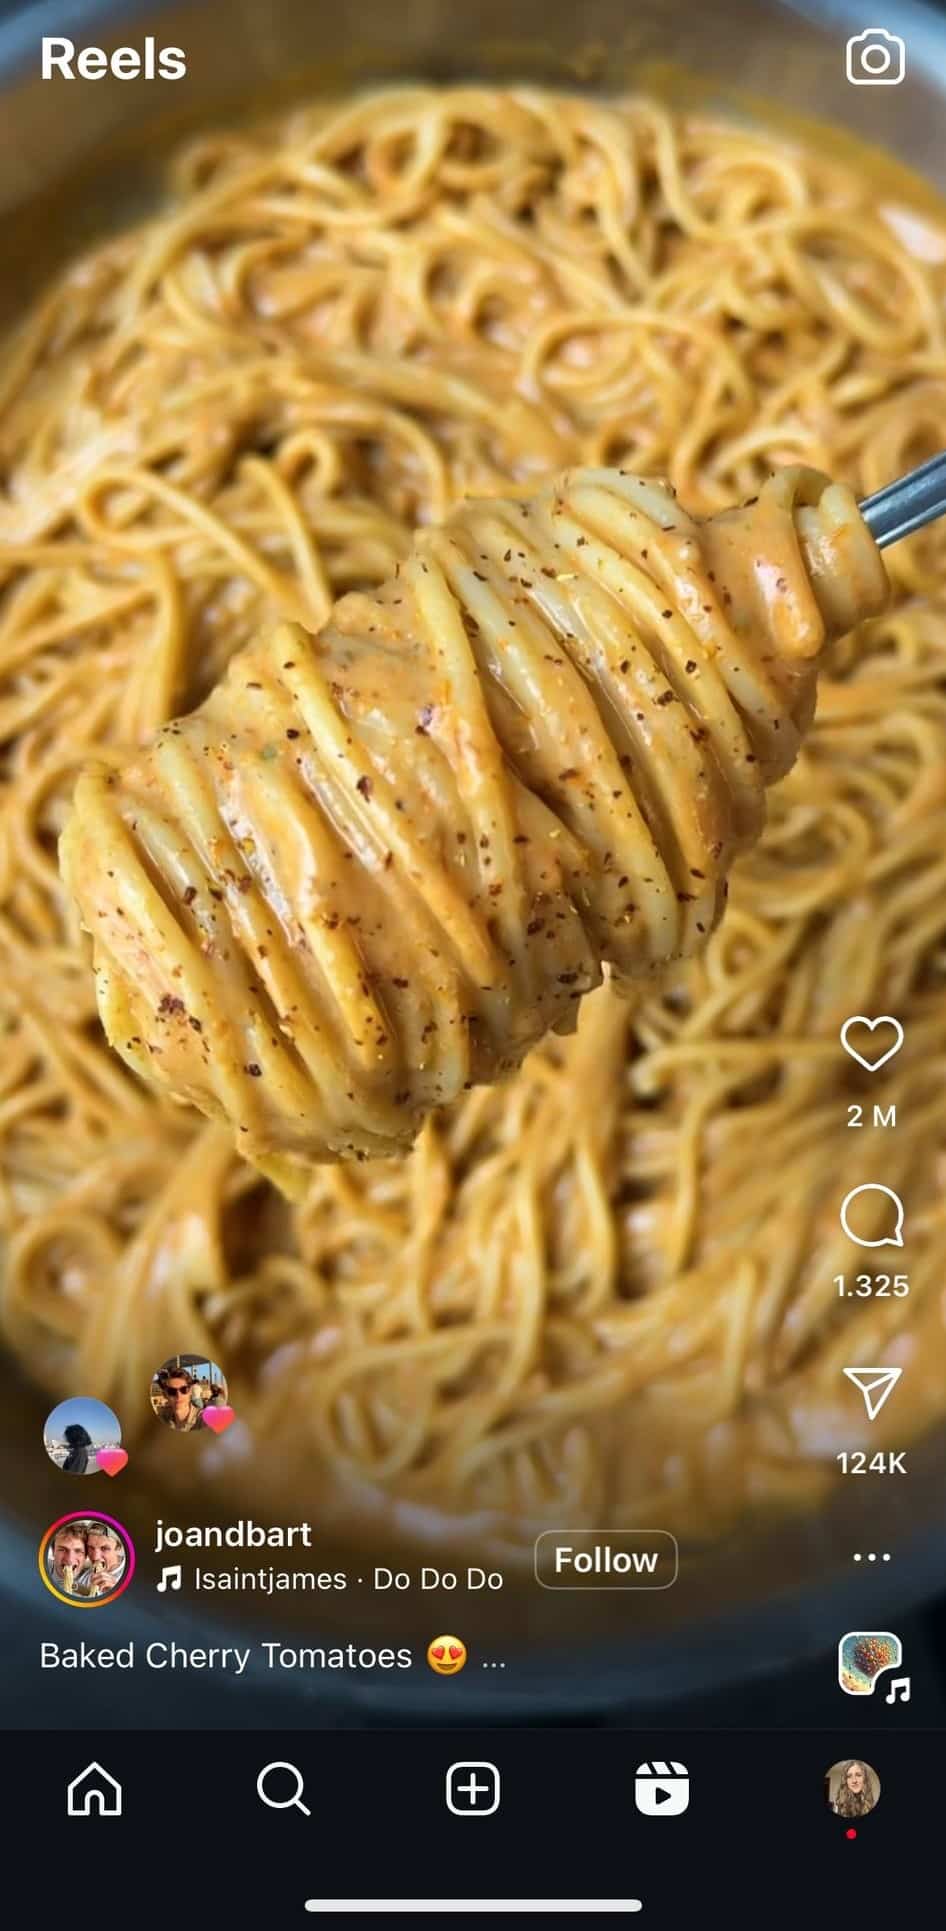
When you make a looping video, the end of your Reel melts into the beginning. This leads to more repeats, and as we all know by now, the more views you get, the more Instagram will boost your video.
To better understand how this works take a look at @joandbart’s looped video. They present a delicious pasta recipe, that starts and ends with the same mouthwatering frame of the finished product:
Here are a few tricks to create the perfect loop video:
- Make sure the lighting is consistent: Film the entirety of your video at the same time so you can have the same lighting from start to finish.
- Edit your audio: Choose an audio file that contains a repeated rhythm that is easy to loop or create a voiceover that ties the end of your video to the beginning (e.g. complete a sentence during the start and end of your video).
- Go for a transition: If you don’t want to worry about lighting, you can use a transition as your way to stitch the end and beginning of your video together. It could be a mirror illusion (change of perspective) or covering your camera with your hand to make the transition.
3. Hop on trends
Participating in the latest Instagram trends is a simple way to gain more exposure on the app. Once a trend increases in popularity, it’s clear that people have a positive reaction to it and want to see more content dedicated to it.
So, take advantage of the trends that are currently popular on Instagram and participate in the fun. It will only take a couple of minutes of scrolling to find something to try out in your content.
Instagram trends have three main elements:
- The staple audio used in all videos participating in that specific trend.
- Hashtags that contain the trend name.
- A specific video structure (e.g. making a transition, using a certain filter).
To stay up to date with the latest trends, keep an eye on the Trends Report series from Instagram’s @Creators account. They also post highlights from creators and insights from insiders that can help you improve your Instagram content overall.
4. Remix other Reels
The “remix” feature is inspired by TikTok’s duet option which allows users to stitch the video of another creator to add to the conversation or share the post further.
To remix a Reel all you have to do is tap on the three dots from the bottom-left side of the video you want to duet, choose the “Remix” option, and start adding your own input, such as text, voiceover, videos, photos, effects, and more.
Instagram will signal that the video is a remix and will allow users to click on the creator’s name and view the original Reel as well.
Remixing other Instagram Reels has the following benefits:
- Gain more exposure: When you remix another creator’s video you will be able to reach a part of their audience.
- Encourage engagement: Using the remix feature to start a debate or share an opinion will get other users to continue the conversation in the comments.
- Find new content ideas: Remixing other people’s Reels is a way to combat your creativity block and use other popular posts to bring something new to the table.
5. Recycle your Instagram Stories and existing video clips
Do you have a collection of videos you are proud of? Then use them as Instagram Reels.
TikToks, Stories, highlights, and any other clips you have stored on your phone can be recycled and shared on Instagram Reels. It’s amazing what a bit of editing and customization can do. Just make sure the contents of your video are still updated and relevant.
How to make a highlight Reel on Instagram
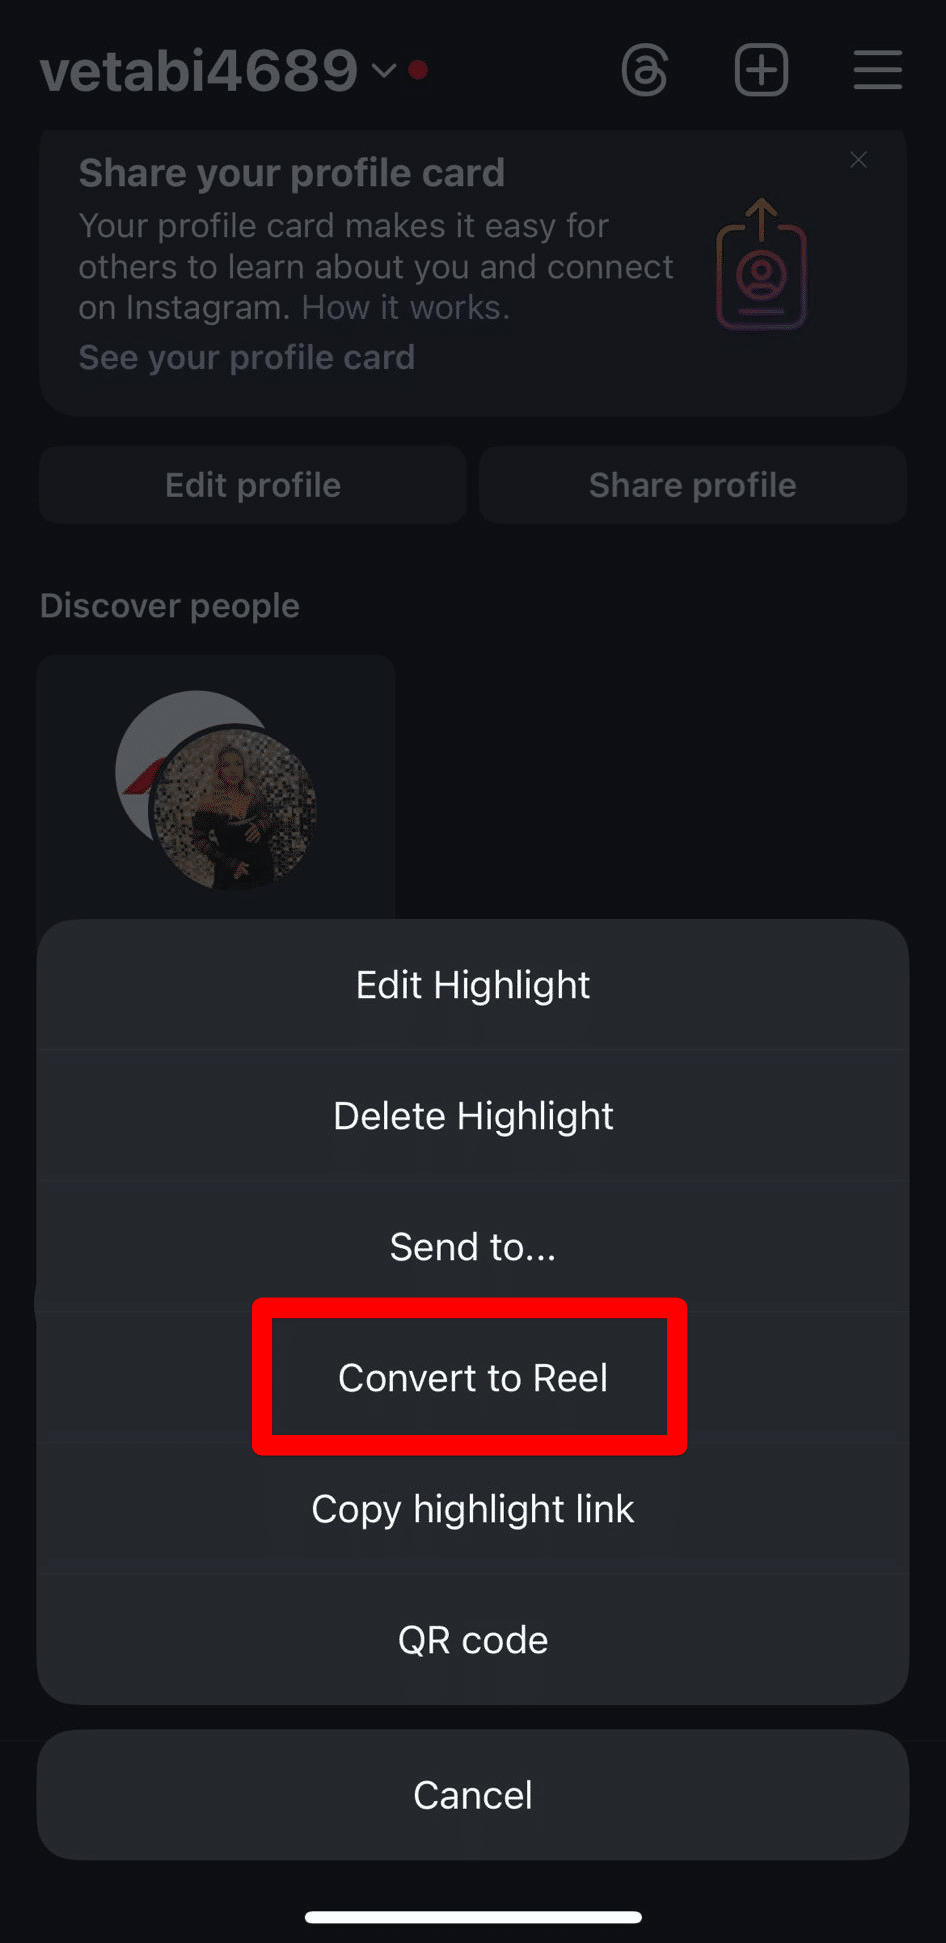
To make a Reel from Instagram Story highlights, all you have to do is press and hold on your highlight, and then tap “Convert to Reel”. The platform will automatically make a slideshow Reel with your Instagram Stories highlights and suggest audio.
This is perhaps one of the easiest ways to repurpose content into Reels on Instagram. However, you won’t be able to add or delete images or videos, so make sure your Story highlight has everything you want in your slideshow beforehand.
To save time and make the most out of your video posts, include evergreen clips as a part of your content strategy. Create videos that will have high informational value over time and schedule them multiple times on your accounts.
You can easily do this from SocialBee. Create an evergreen content category, add your content, and your videos will get reposted regularly according to your set schedule.
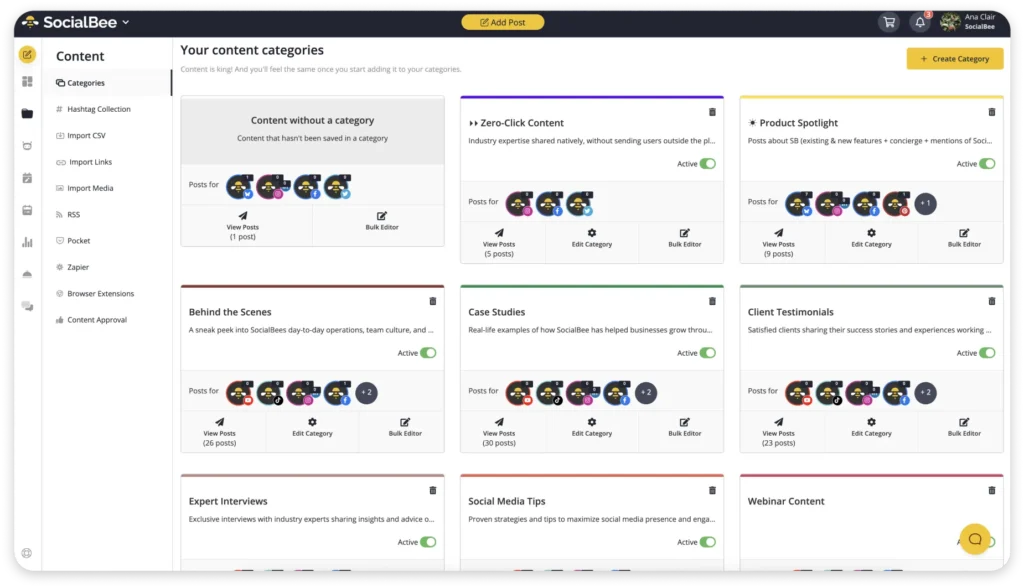
The content category feature also allows you to diversify your content with ease. Assign a new topic to each category of posts and schedule them alternatively throughout the week to make sure you post a healthy mix of content.
Organize your Instagram content in categories to edit and share your posts in bulk.
6. Add text to Reels
Adding text to your videos has more benefits than you might think. It can help you highlight a point you are trying to make in your video and gain views from people who scroll through Reels with the sound off.
If you think that percentage of people is low, you might want to fact-check your speculation. Studies showed that 69% of people report viewing videos without sound in public places, while 25% of people report viewing videos without sound in private places.
More importantly, adding text to your Reels makes your videos accessible to hearing-impaired social media users and shows that you care about creating inclusive content.
7. Make Reels shoppable
Although you should predominantly share Reels that are more entertaining and educational rather than promotional, from now and then you can dedicate your videos to talking about your products and services.
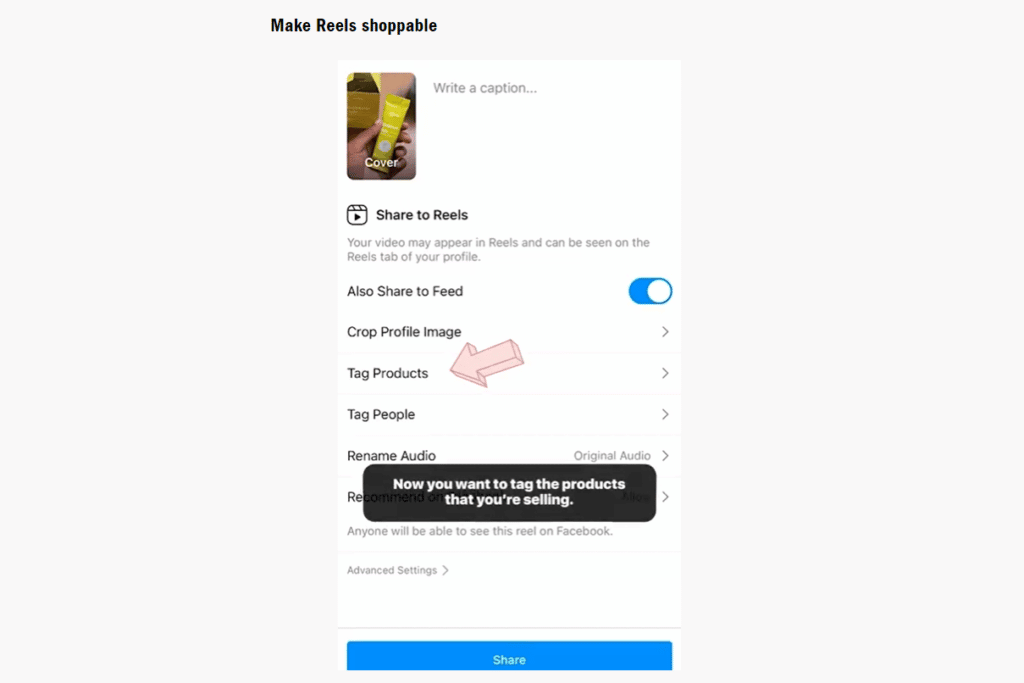
To turn all those views into something profitable, make your videos shoppable by adding product tags to your Reel.
Here is how you can make your Reels shoppable:
- Record/ upload your Reel.
- Tap the “Tag products” option before sharing your video.
- Add a cover image and a CTA to optimize your performance.
Frequently asked questions
Instagram Reels can be between 15 seconds and 3 minutes if created directly in the app, or up to 15 minutes long if uploaded.
The main difference between Instagram Reels and Stories is the section of the app they are featured in. While Reels are shown in a vertical video feed that users can cross through, Stories are featured at the top of user feeds where people can see them by tapping from one Instagram Story to another.
Another important difference is the target audience. Reels have an audience mainly consisting of Instagram accounts that don’t follow you. On the other hand, the people who will be most exposed to your Stories will be the ones that already fall into the “follower” category.
From certain standpoints, Reels are better than Stories because they offer more visibility opportunities, allow more engagement between the creator and viewer (likes, comments, shares), and provide more video creation and editing tools (video effects, templates, sound effects).
Post Reels and improve your Instagram marketing strategy
Now that you are familiar with the Reel creation process and already have some tips and tricks under your belt, it’s time to post Reels and reap the benefits.
Share some wisdom with your audience, show your fun side, and experiment with the multiple video effects Instagram has to offer.
And remember, you don’t have to throw away your videos after posting. Repurpose your best Instagram Reels with SocialBee. Start your 14-day free trial today and manage all your short-form video content from one platform.

