
When you run a social media strategy, it often involves numerous platforms on which you have to create and post content. This is time-consuming and can become quite tedious. So, if there is a way to make cross-posting easier, why not take it?
Because Instagram and Facebook are both part of Meta, you can easily share the same content across both platforms with a few simple settings. This helps you get more views and engagement from a single image, Story, or Reel across both accounts.
We’ll give you a step-by-step guide on how to share Facebook posts to Instagram, as well as some valuable tips and tricks to keep up your sleeve.
![]()
Why should you share your Facebook posts on Instagram?
In case you’re already putting time into creating and writing Facebook posts, it makes sense to extend the life of that content. Sharing your best posts on Instagram gives your message a second chance to be seen, especially if your audiences overlap but aren’t identical.
Some people check Facebook daily. Others rarely open it but scroll through Instagram constantly. When you show up on both, you reduce the chances of being missed.
There’s also consistency. Posting on multiple platforms regularly builds familiarity. If someone sees your brand in more than one place, you stay top of mind longer.
That said, this isn’t about copying everything over automatically. It works best when you choose strong posts and adjust them for Instagram’s format and style.
Think of it as smart distribution. You’ve already created the content. Sharing it strategically helps you get more value from the work you’ve already done.
How to link Facebook to Instagram
Before you can cross-post or plan future Instagram posts directly from Facebook, you need to link your accounts.
There are two different ways to link Facebook and Instagram: through the Facebook app or the Instagram app. If you manage multiple Pages inside a business portfolio, make sure you select the correct Facebook Page when linking accounts.
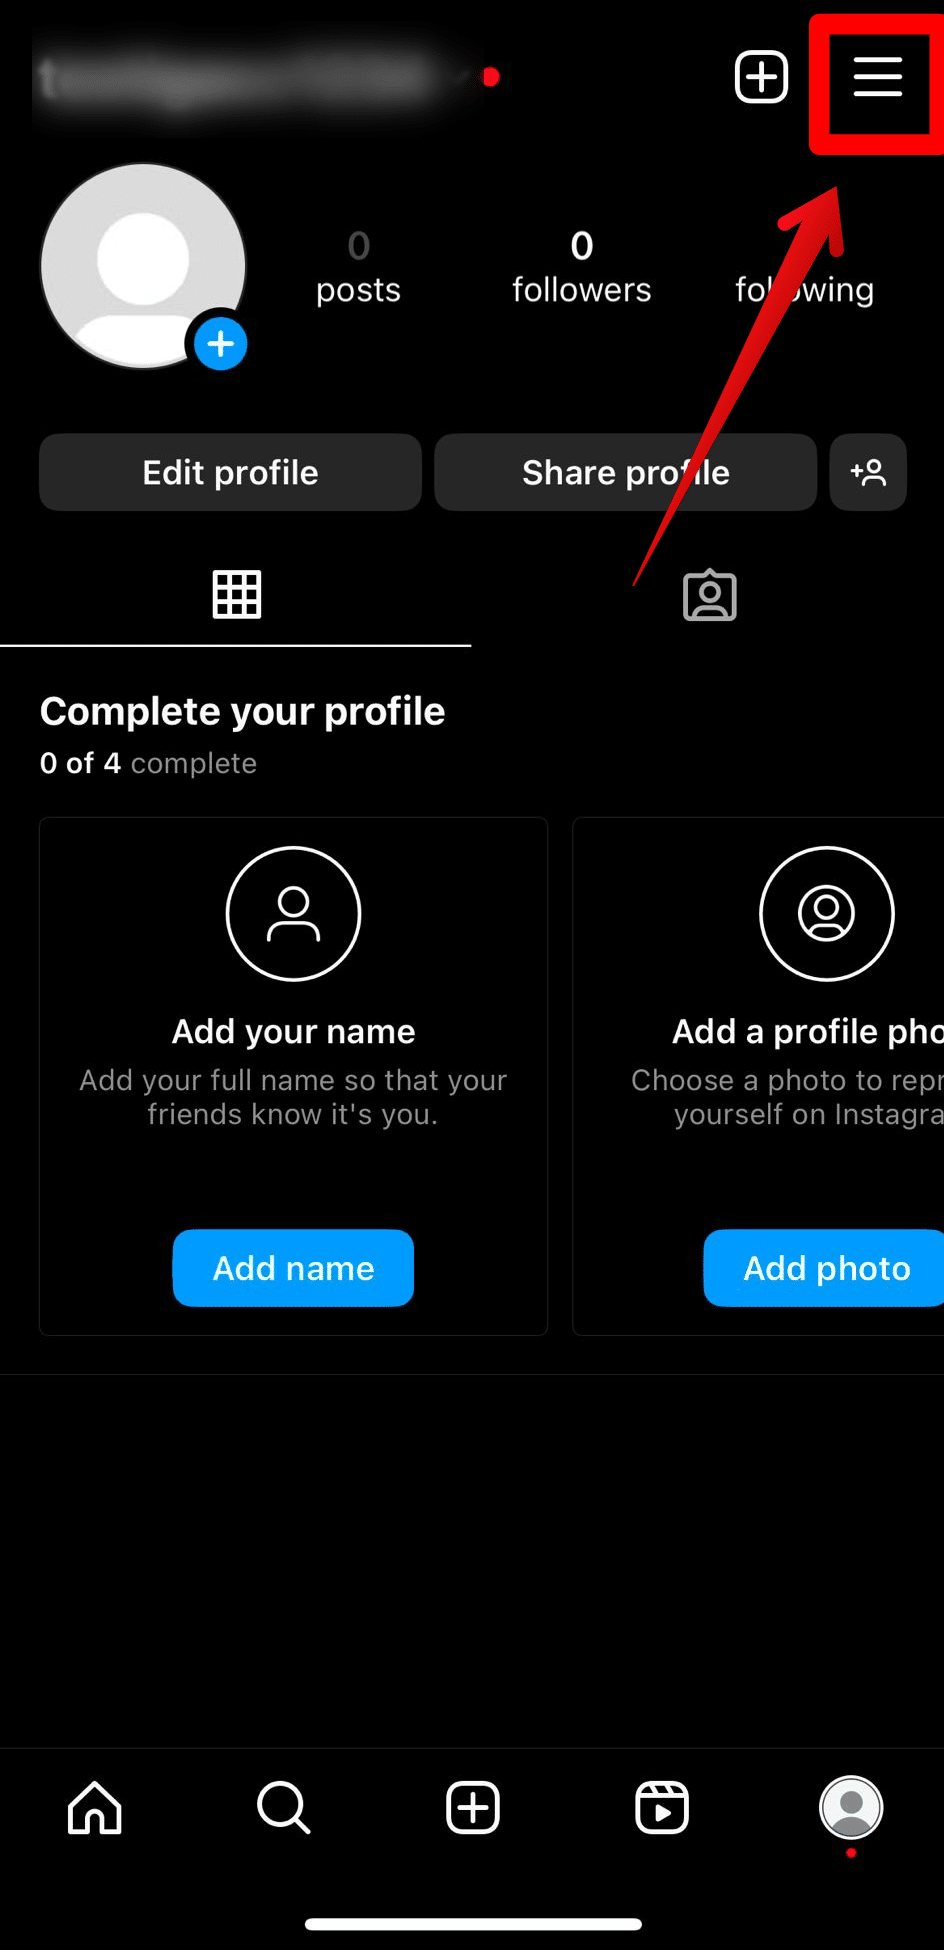
How to link Facebook to Instagram from the Instagram app:
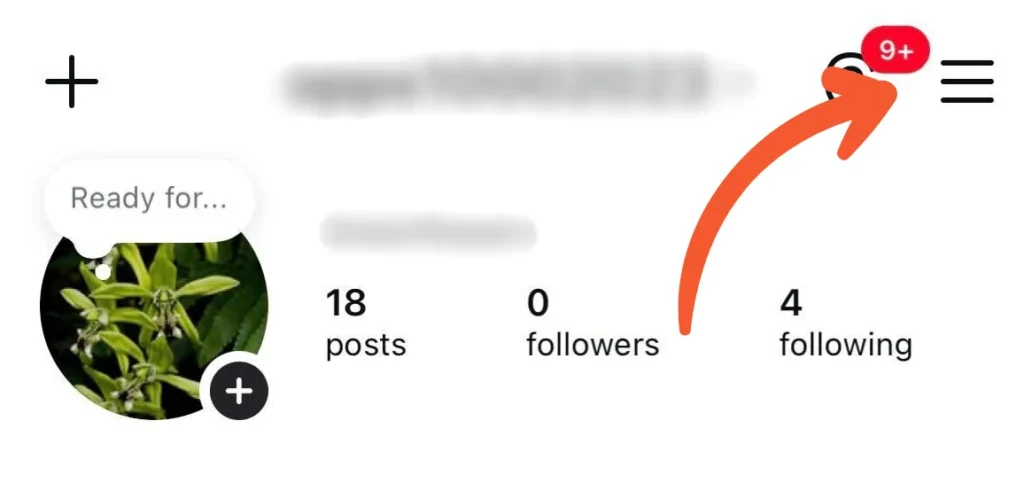
- Open your profile on the Instagram app and click on the three lines at the top right corner of your screen.

- Then, tap “Accounts Center.”

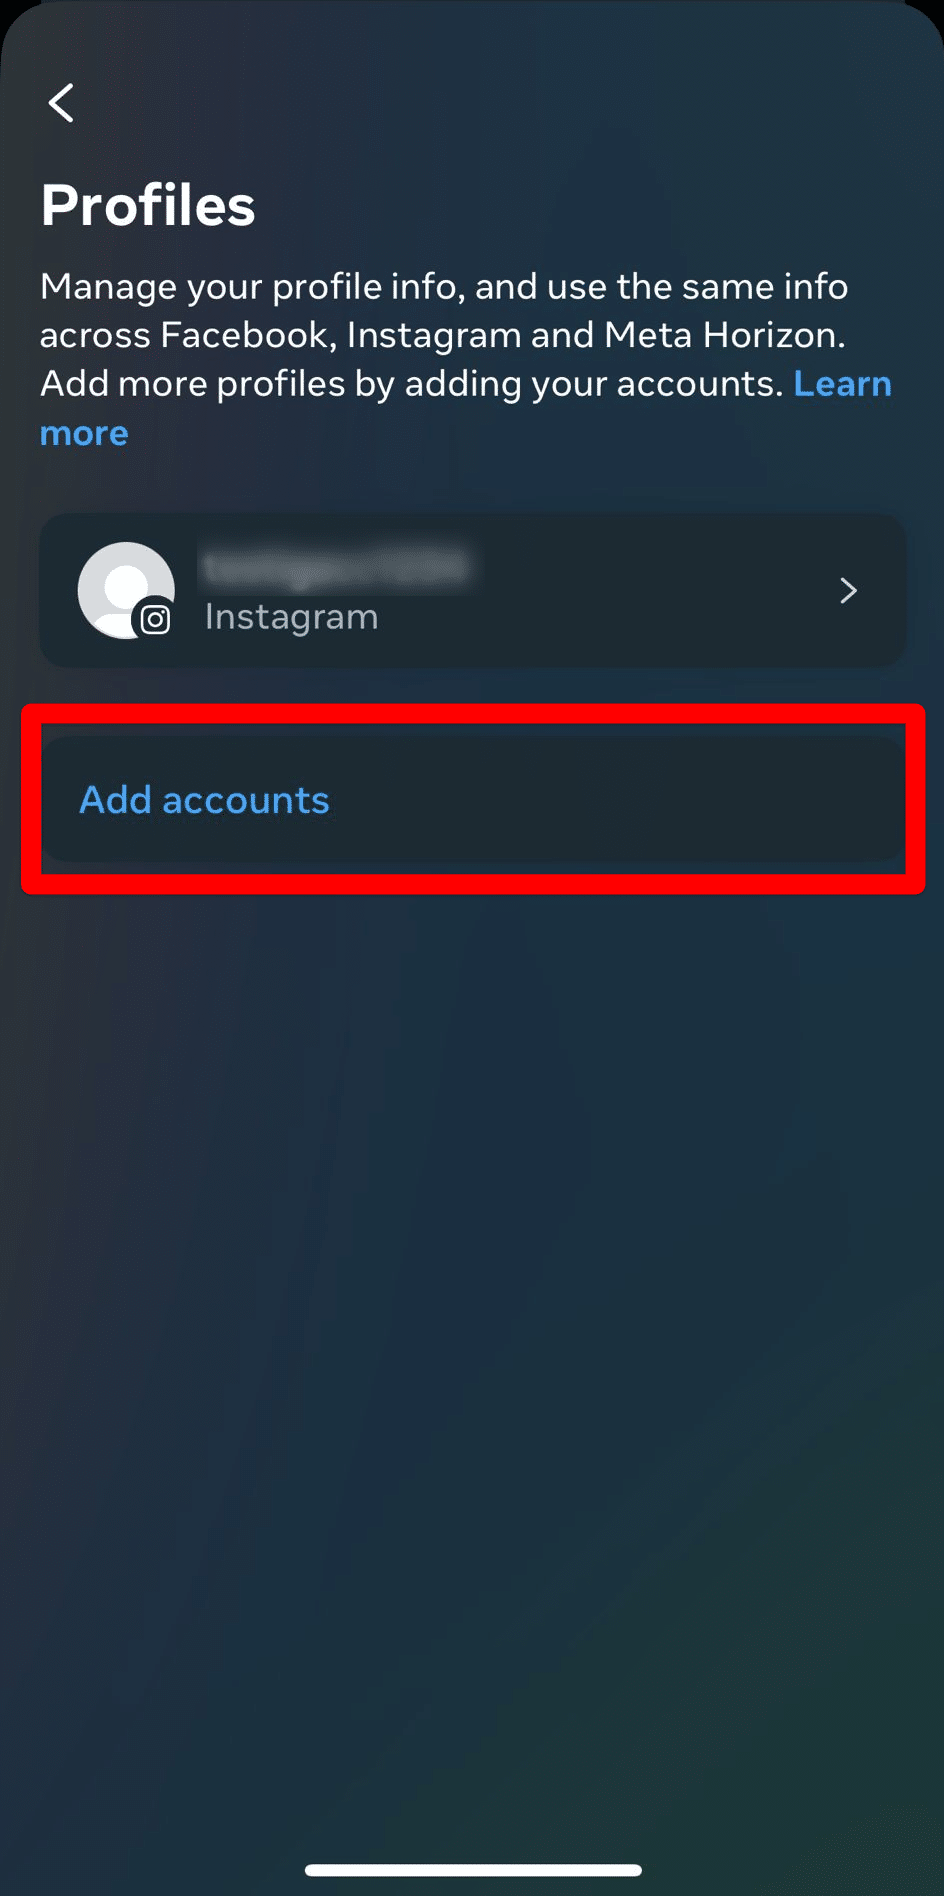
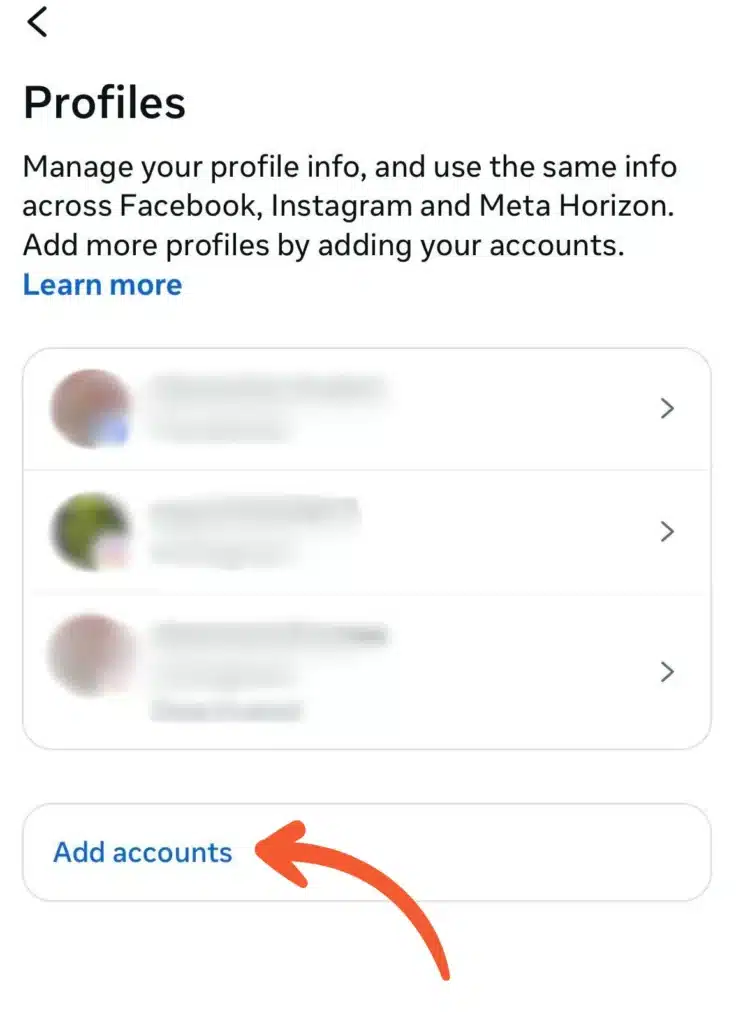
- From here, go to “Profiles”.

- Select “Add accounts” and tap add Facebook account.

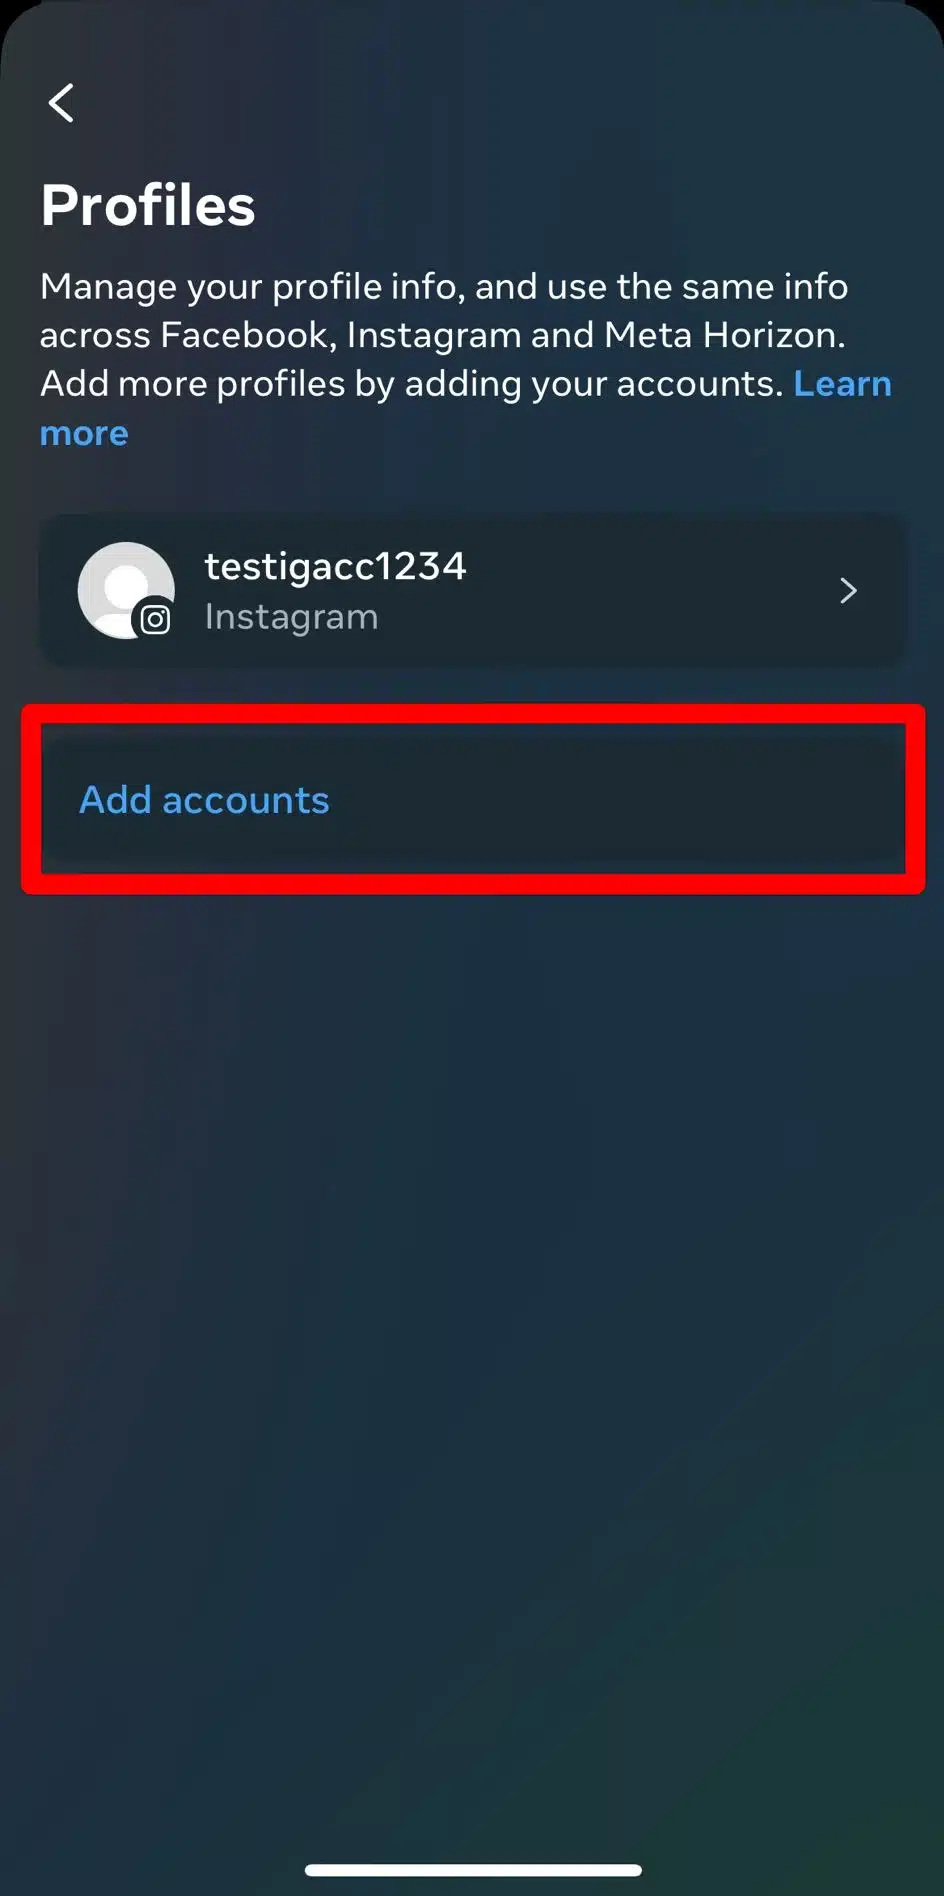
This is usually the fastest method if you’re already logged into your professional Instagram account. It will link the two Meta accounts, and you will now be able to cross-post. You can link multiple Instagram accounts and Facebook pages.
How to link Facebook to Instagram from the Facebook app:
- Open the Facebook app on your mobile device.
- Tap the Menu icon (☰) in the top-right corner.

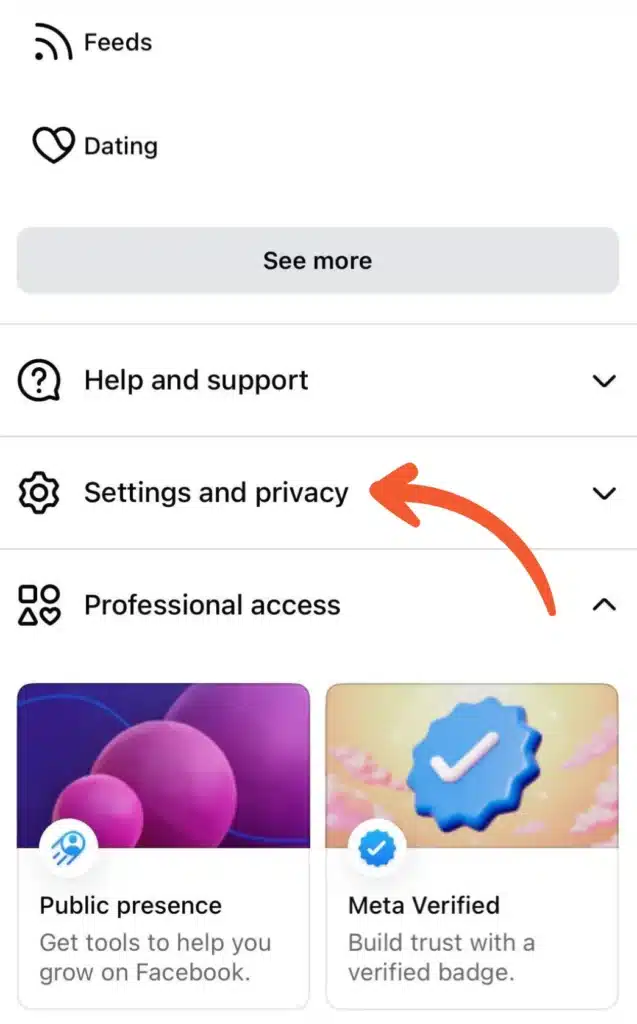
- Scroll down and click “Settings & Privacy.”

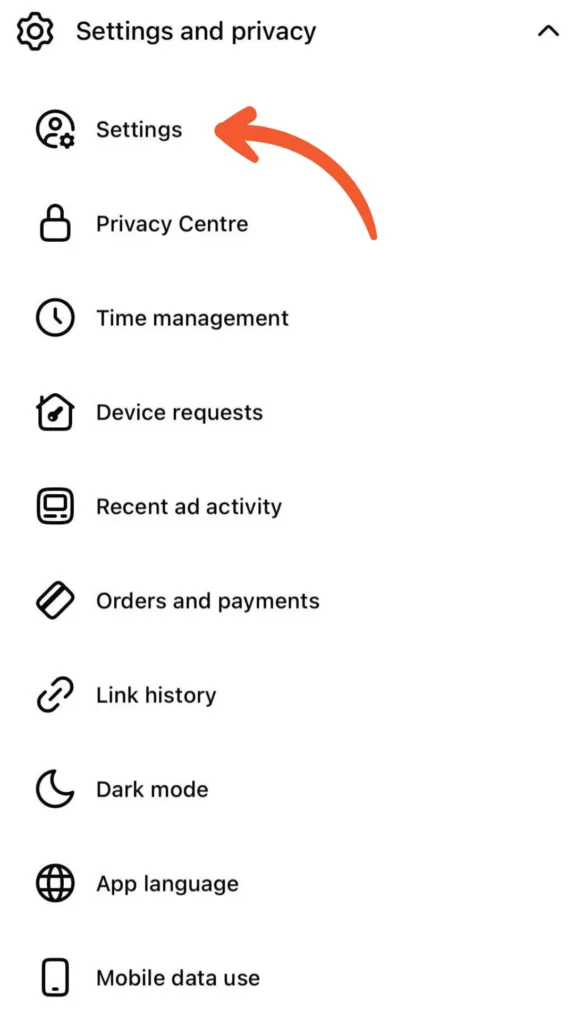
- Then tap “Settings.”

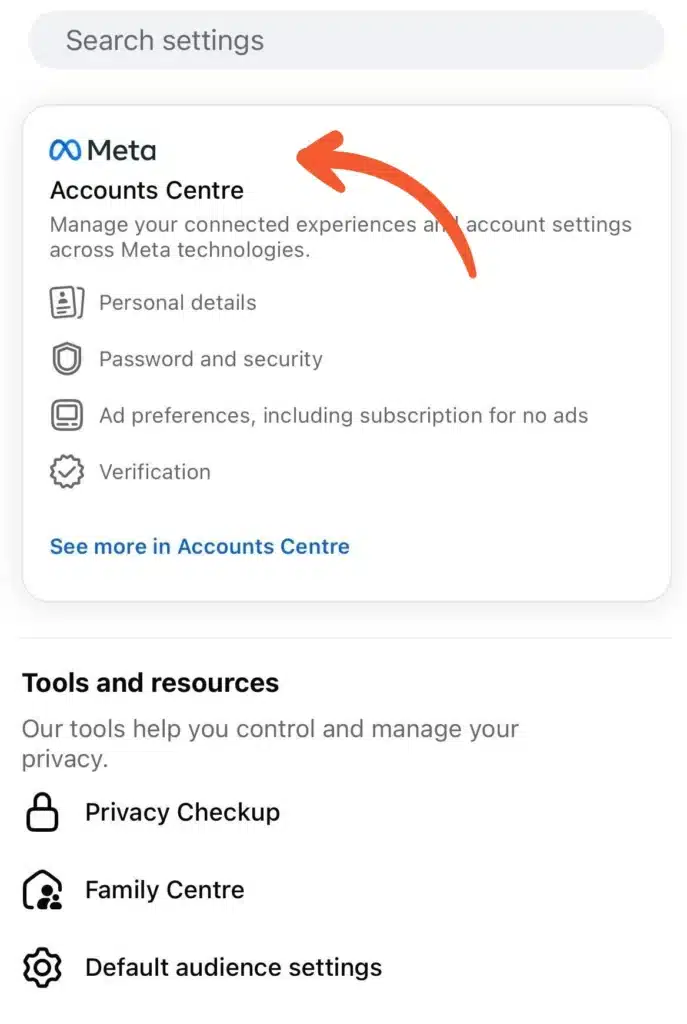
- Tap on “Meta Accounts Center.”

- Select “Profiles.”

- Tap “Add accounts.”

- Choose “Add Instagram account” to connect Instagram and log in.
- Follow the on-screen instructions to complete the linking process.


Now you can use the cross-posting feature on the linked accounts.
After connecting your accounts, it’s a good idea to double-check everything is set up correctly. You can easily manage linked accounts inside Meta Accounts Center if you need to make changes later.
How to turn on automatic sharing between Facebook and Instagram
To automatically share your Instagram posts, Stories, and Reels to Facebook, you need to connect both accounts through Meta Accounts Center.
You can enable this setting from either the Facebook or Instagram app.
How to turn on automatic sharing from the Facebook app (iPhone or Android):
- Open the Facebook app on your mobile device.
- Tap the Menu icon (☰) in the top-right corner.
- Scroll down and tap “Settings & Privacy,” then select “Settings.”
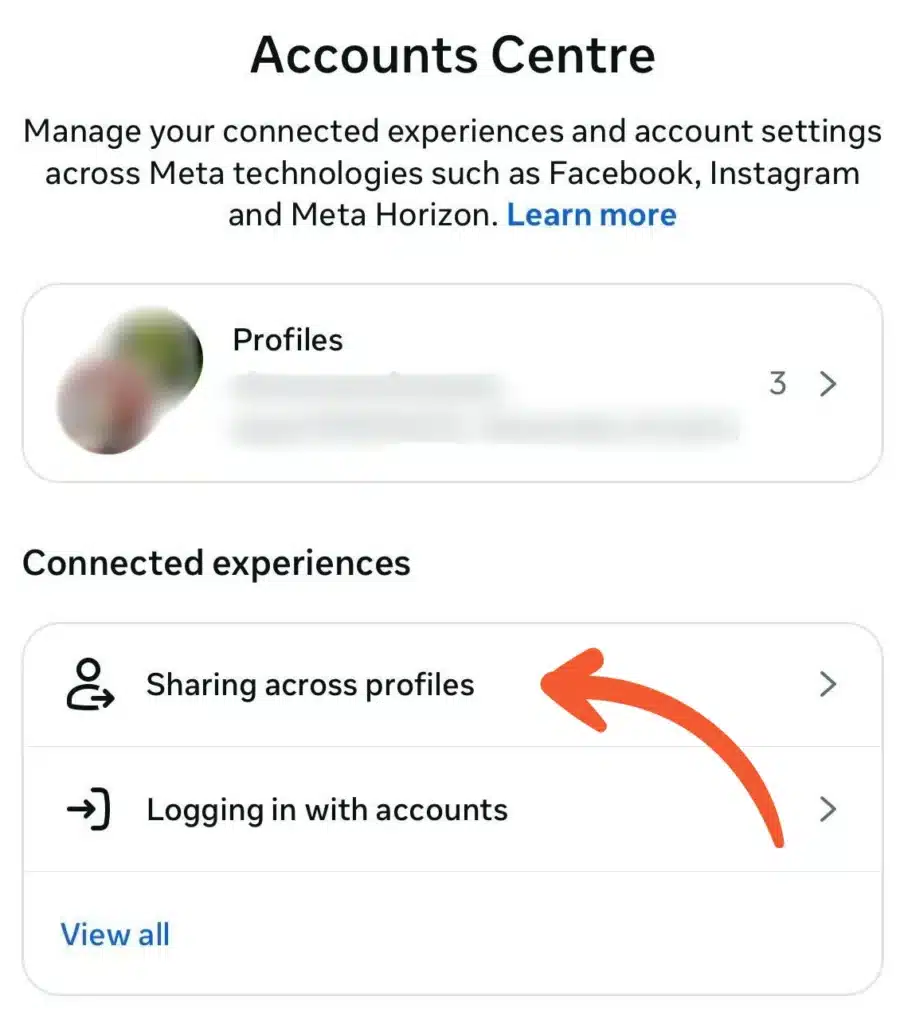
- Tap “Meta Accounts Center.”
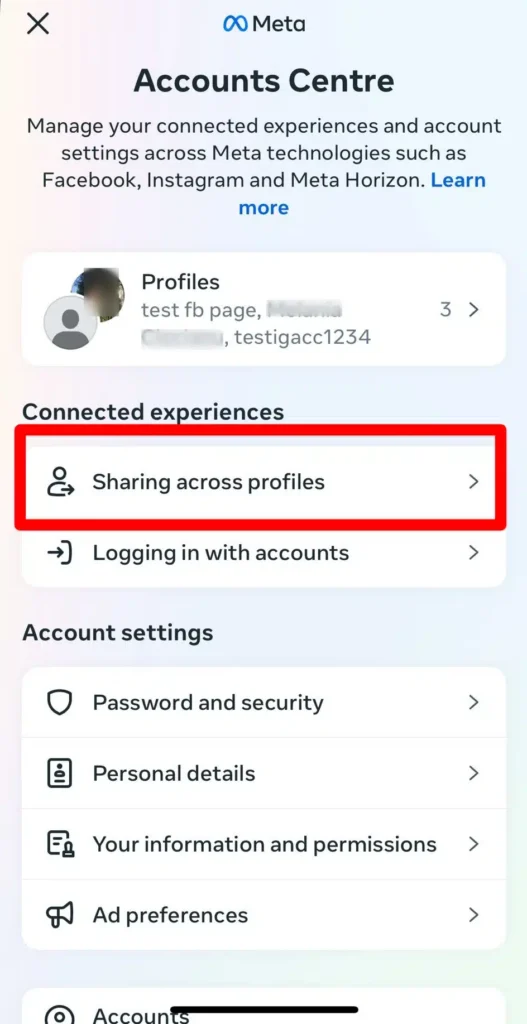
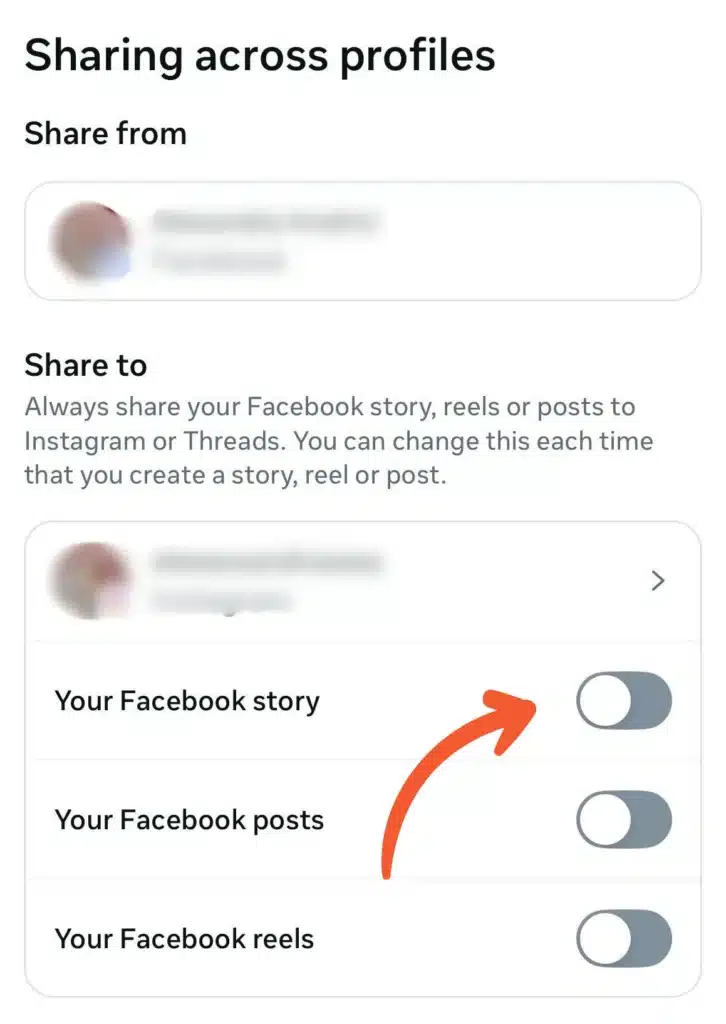
- Select “Sharing across profiles.”

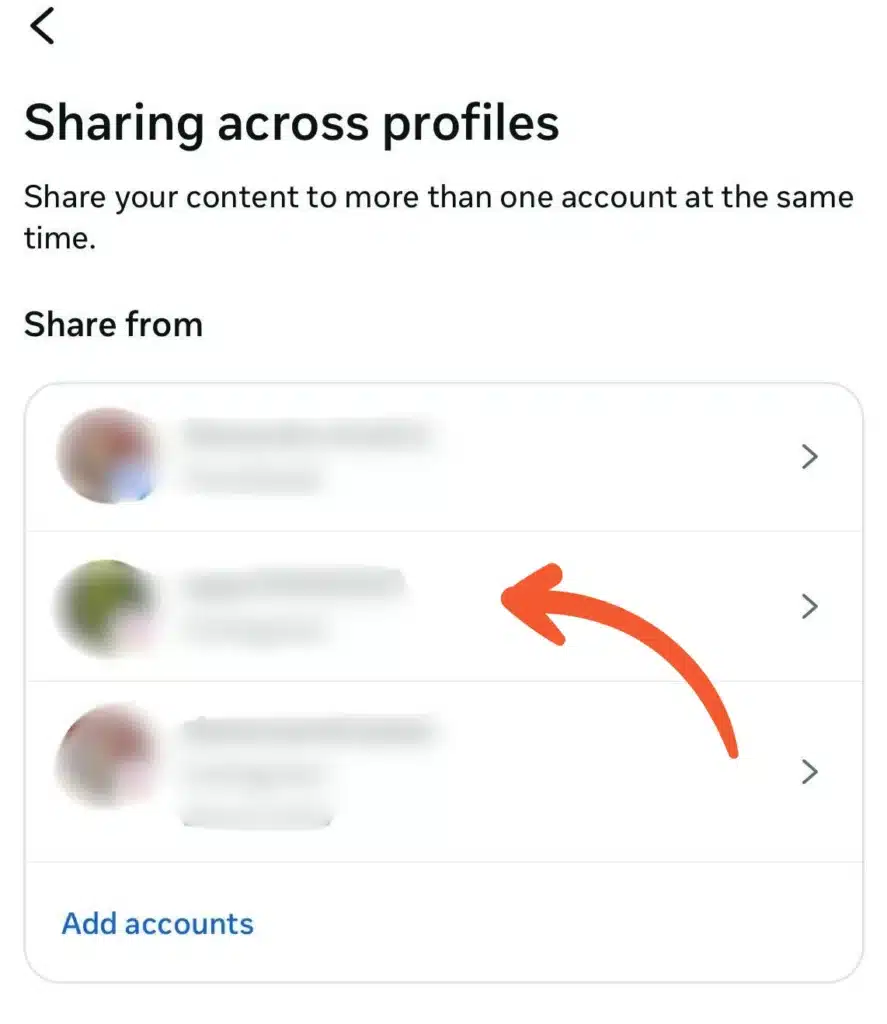
- Choose your Facebook profile.

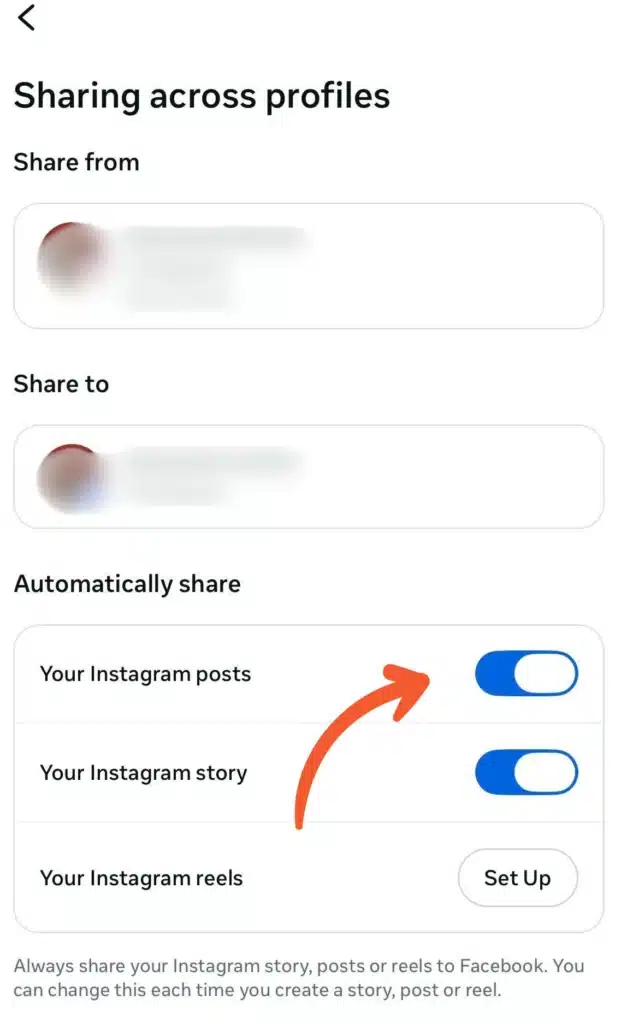
- Under “Share to,” turn on the toggles for posts, Stories, and Reels.

How to turn on automatic sharing from the Instagram App (iPhone or Android):
- Open the Instagram app and go to your profile.

- Tap the three lines (☰) in the top-right corner.

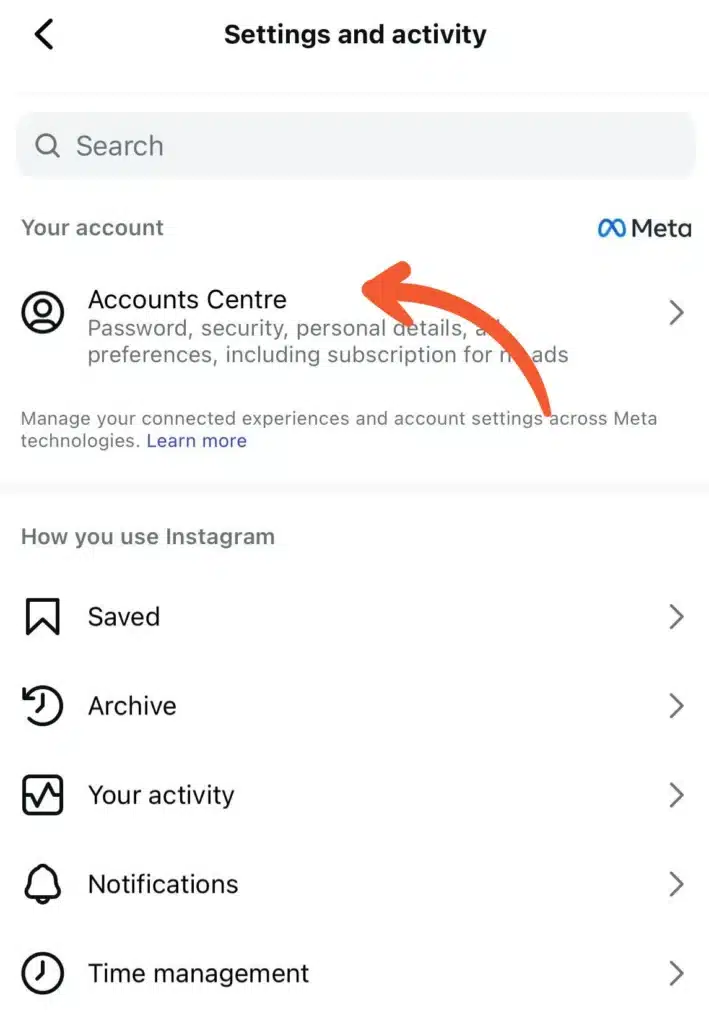
- Tap “Accounts Center.”

- Select “Sharing across profiles.”

- Under “Share from,” choose your Instagram profile.

- Turn on the toggles for posts, Stories, and Reels.

Once this is turned on, Instagram automatically shares eligible posts, Stories, and Reels to Facebook when you publish.
Meta’s limitations with cross-posting Facebook posts to Instagram
Meta makes it possible to cross-post between Facebook and Instagram, but the feature isn’t as flexible as it seems.
Here’s what you need to know about Meta’s limitations regarding cross-posting Facebook and Instagram posts:
- Both accounts must be linked through the Meta Accounts Center before cross-posting is possible.
- You can’t retroactively share a Facebook post to Instagram after it’s already published.
- Automatic scheduling is limited to basic toggles. Advanced automation, structured scheduling, or performance-based boosting isn’t available natively.
- The same post often needs edits. Long captions, links, and formatting that work on Facebook may underperform on Instagram, which means you may need to adjust content on Instagram manually before publishing.
- Some Facebook posts can’t be shared to Instagram due to format or feature limits, including:
- Posts with multiple videos or more than 10 photos;
- Posts with photos of different sizes;
- Photos that are too tall or too wide for Instagram (some may be cropped);
- Text-only posts;
- Live videos;
- Reshares;
- Certain Facebook-specific creative tools.
How to share posts from Facebook to Instagram
There are three types of posts that you can share on your Instagram and Facebook profiles: feed posts, Reels, and Stories. Let’s look at how to cross-post each of them.
How to share Facebook feed posts to Instagram:
- Open the Facebook mobile app.
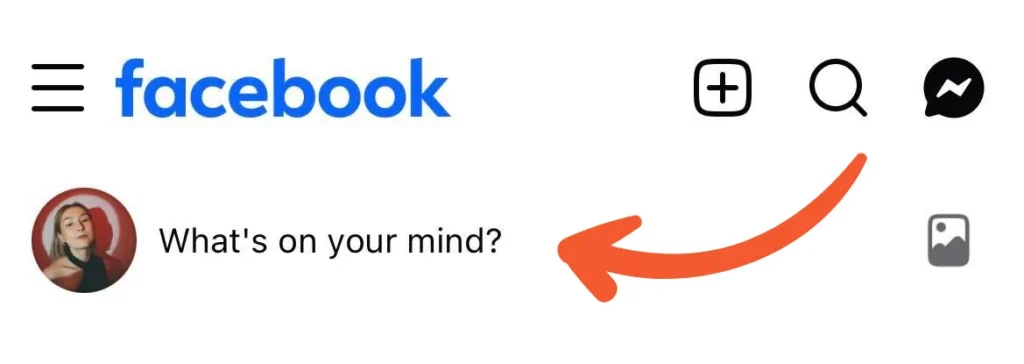
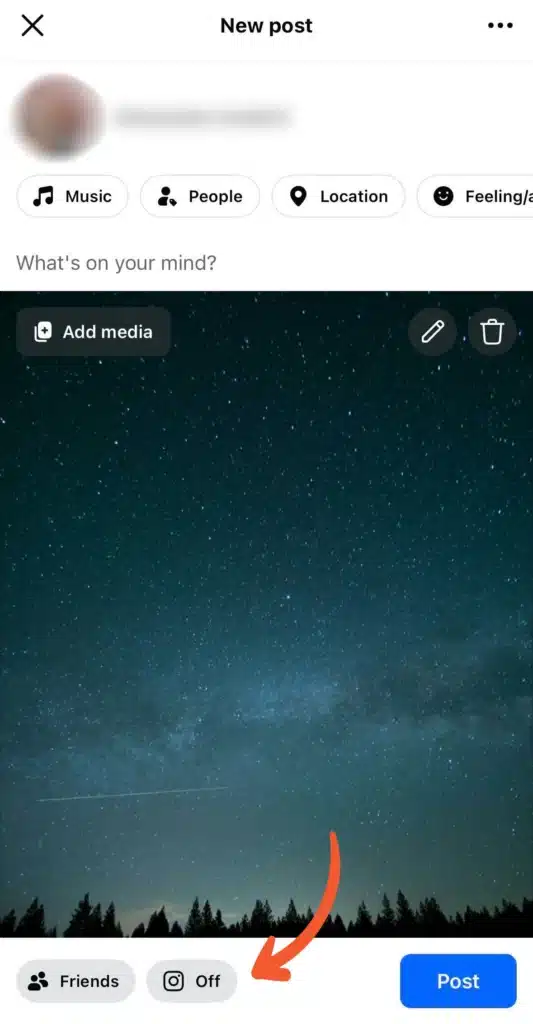
- At the top of your Feed, tap “What’s on your mind?” next to your profile picture.

- Create your post by adding your caption and media (photo or video).
- Tap the Instagram sharing option to choose where your post will be posted. The Instagram button will show whether sharing is “On” or “Off.”

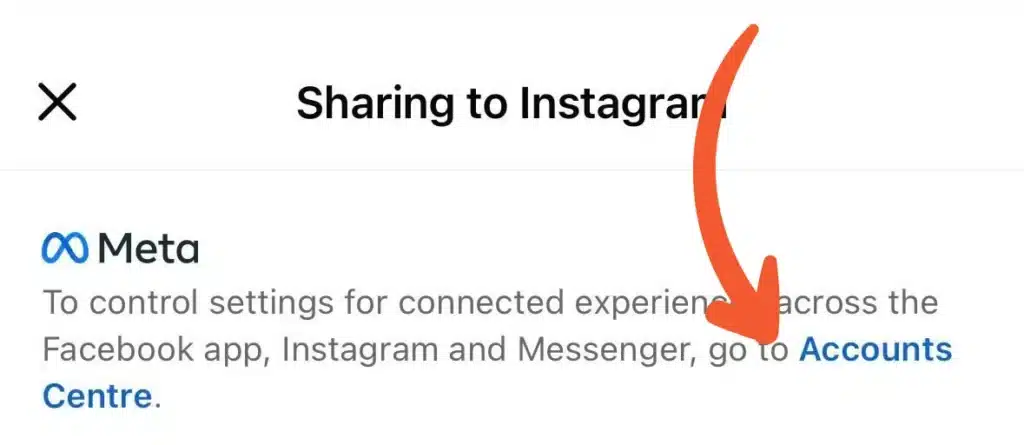
- If it shows “Off,” tap the Instagram icon, then select “Accounts Center.”

- Turn on the toggles for Facebook posts, Stories, and Reels to share them to Instagram.

- Tap “Done” to save your settings.
- Tap “Post” to publish your content to Facebook and Instagram.
This way, you will share individual Facebook posts to Instagram.
How to share Reels from Facebook to Instagram:
- To create a Reel, open Facebook from your mobile app and tap the plus (+) sign at the top right of your screen. Then select “Reel” from the dropdown menu.

- Tap the camera icon in the top right to film a video or upload media from your camera roll.
- Edit your Reel by adding audio, text, effects, and stickers.
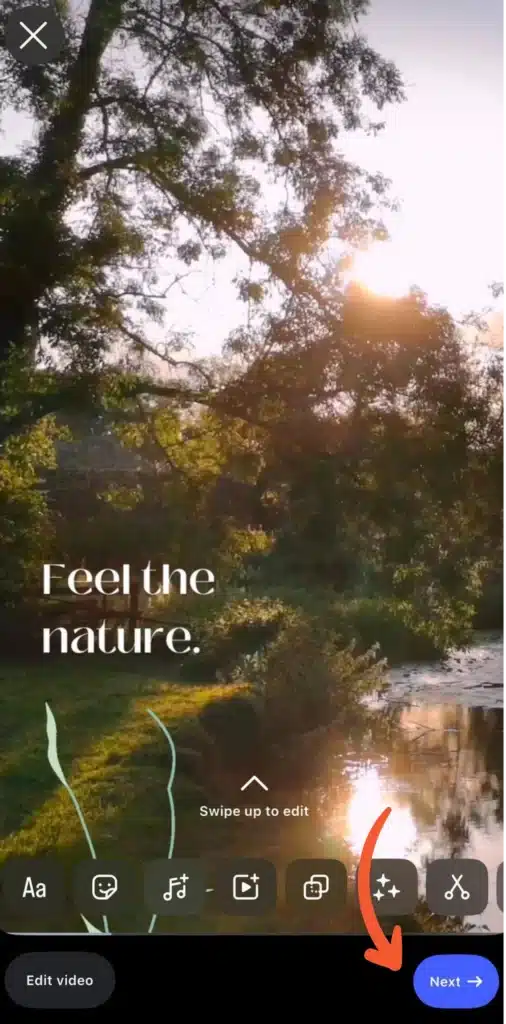
- Once your Reel is ready, tap “Next.”

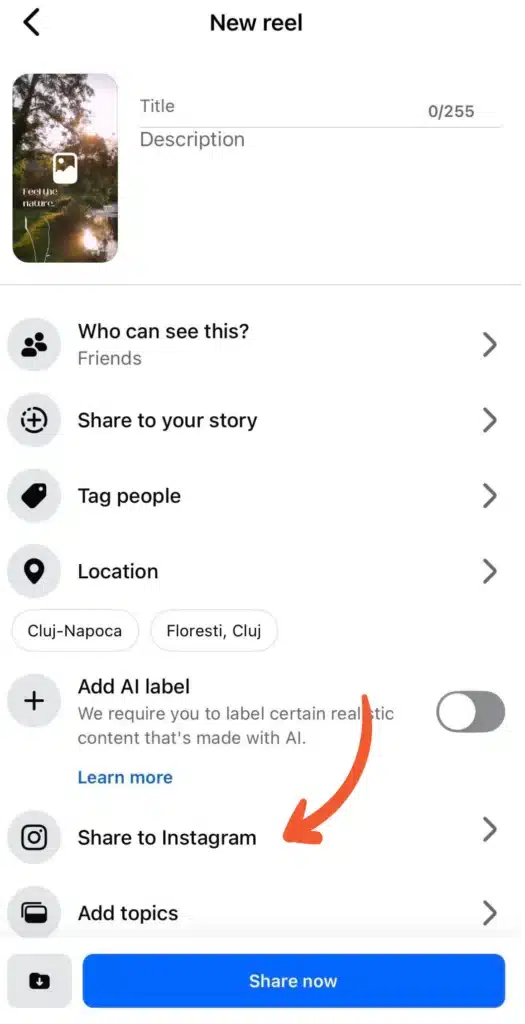
- Add your caption, choose who can see your post, select whether to share it as a Story, tag people, add a location, and adjust other settings.

- Tap “Share to Instagram”, then select “Accounts Center.”
- Turn on the toggles for Facebook posts, Stories, and Reels to share them to Instagram.
- Tap “Done” to save your settings.
- Finally, tap “Share Now.”


And you’re done! Your video will appear as a Reel and Instagram feed post.
How to share Facebook Stories to Instagram:
- To create a Story, open the Facebook mobile app and tap the plus (+) sign at the top right of your screen. Then select “Story” from the dropdown menu.
- Tap the camera icon in the top right to film a video or upload media from your camera roll.
- Edit your Story by adding audio, text, effects, and stickers.
- Tap on the Instagram icon, then select “Accounts Center.”

- Turn on the toggles for Facebook posts, Stories, and Reels to share them to Instagram.
- Tap “Done” to save your settings.
- Finally, tap “Share.”

How to share posts from Instagram to Facebook
You can also share content the other way around. Instagram allows you to publish feed posts, Reels, and Stories to Facebook at the same time.
How to share feed posts from Instagram to Facebook:
- Open the Instagram mobile app.
- Tap the plus (+) icon in the top left corner of your screen.

- Upload media from your gallery or use the camera to take a photo or record a video, then tap “Next.”
- Edit your content by adding music, effects, stickers, and more. Then tap “Next.”

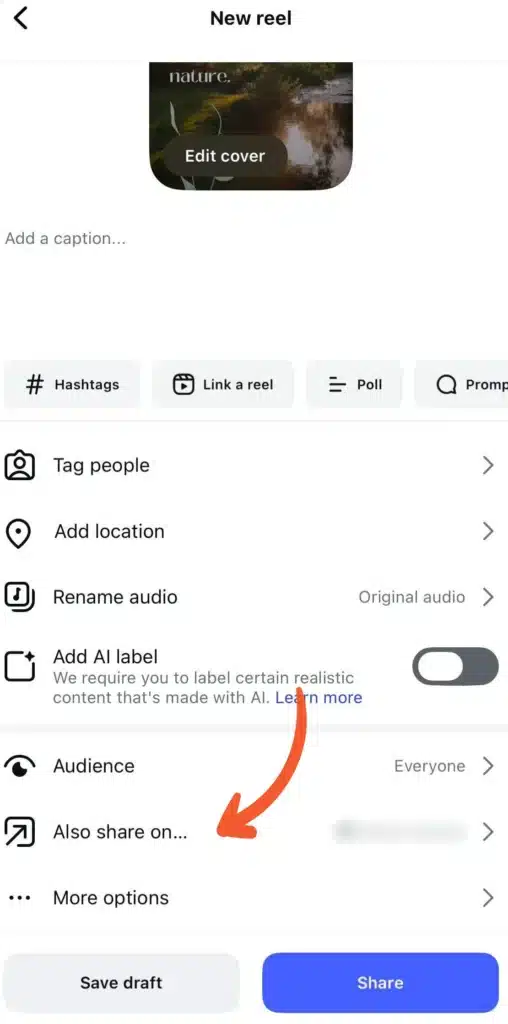
- Add your caption, tag people, add a location, and adjust other settings.
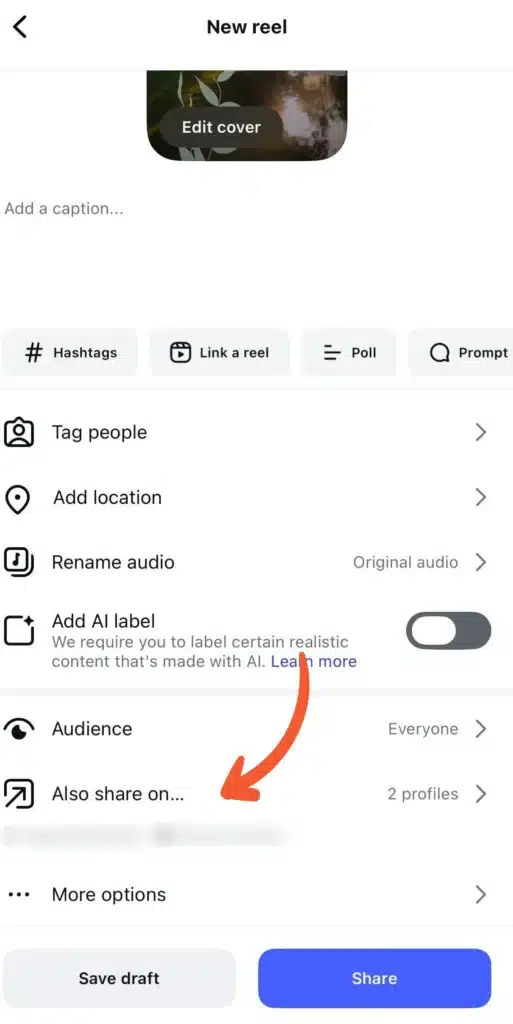
- Before sharing your post, scroll down and tap on the “Also share to…” option.

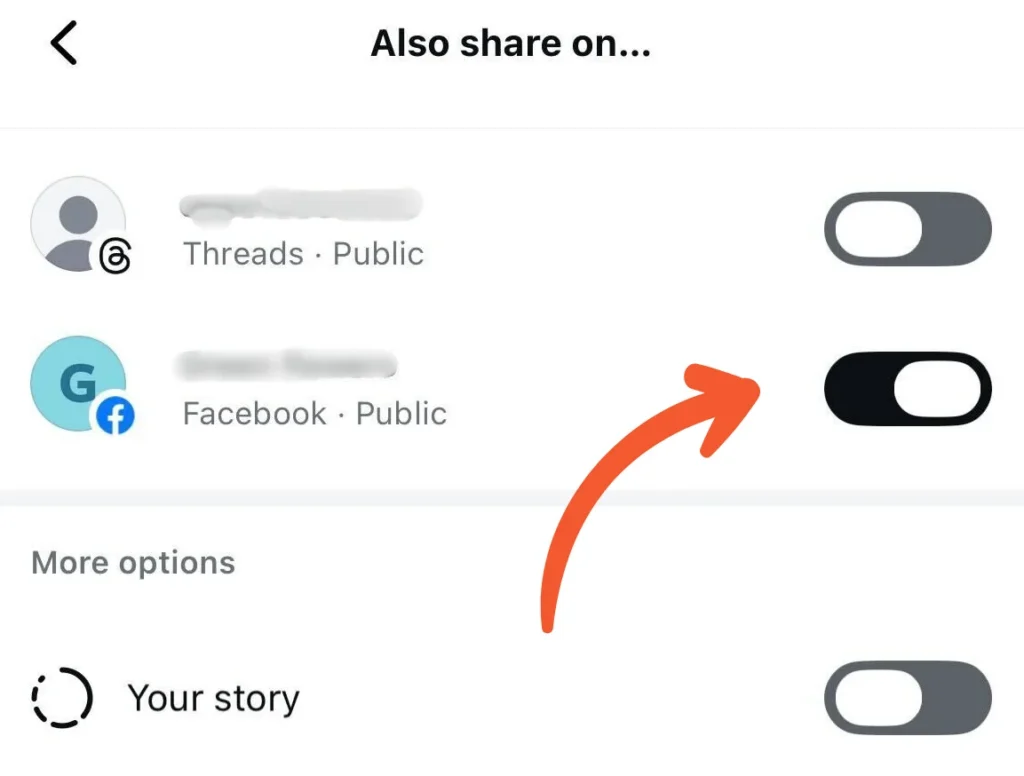
- Toggle the switch to on next to your Facebook Page’s name.

- Tap the back arrow in the top left corner, then tap “Share.”

How to share Reels from Instagram to Facebook:
- Open the Instagram mobile app and switch to the Reels tab.
- Tap the plus (+) icon in the top left corner of your screen.
- Upload media from your gallery or use the camera to take an Instagram photo or record a video, then tap “Next.”
- Edit your content by adding music, effects, stickers, and more. Then tap “Next.”
- Add your caption, tag people, add a location, and adjust other settings.
- Before sharing your post, scroll down and tap “Also share to…”.

- Toggle the switch to on next to your Facebook Page’s name.
- Tap the back arrow in the top left corner, then tap “Share.”
How to share Stories from Instagram to Facebook:
- Open the Instagram mobile app.
- Tap the plus (+) icon at the top of your screen and select “Story” from the content options at the bottom.
- Upload media from your gallery or use the camera to take a photo or record a video.
- Edit your content by adding music, effects, stickers, and more.
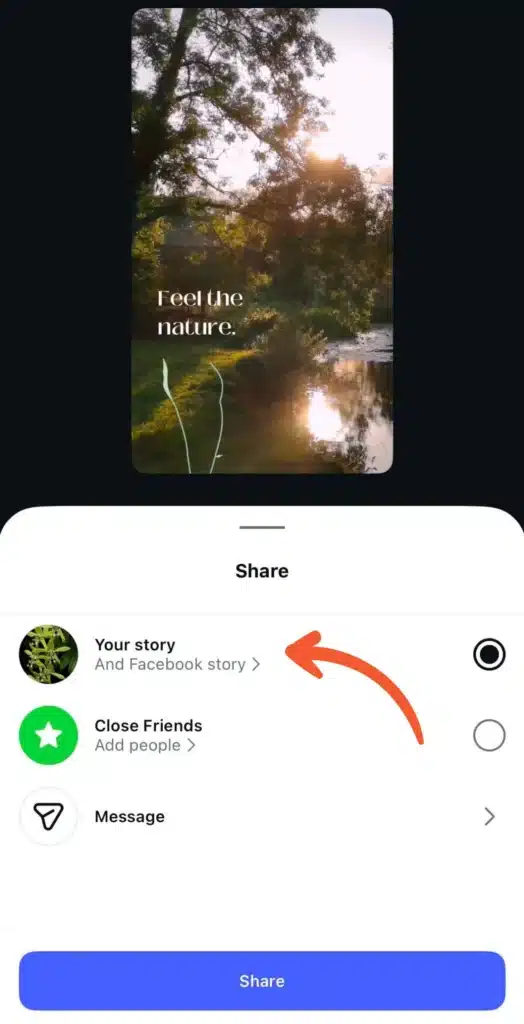
- If your Facebook and Instagram accounts are connected and cross-sharing is enabled, you will see a button in the bottom left corner with your Facebook profile and “Your Story,” which means it will also be shared on Facebook. Then, tap the arrow in the bottom right corner to post.

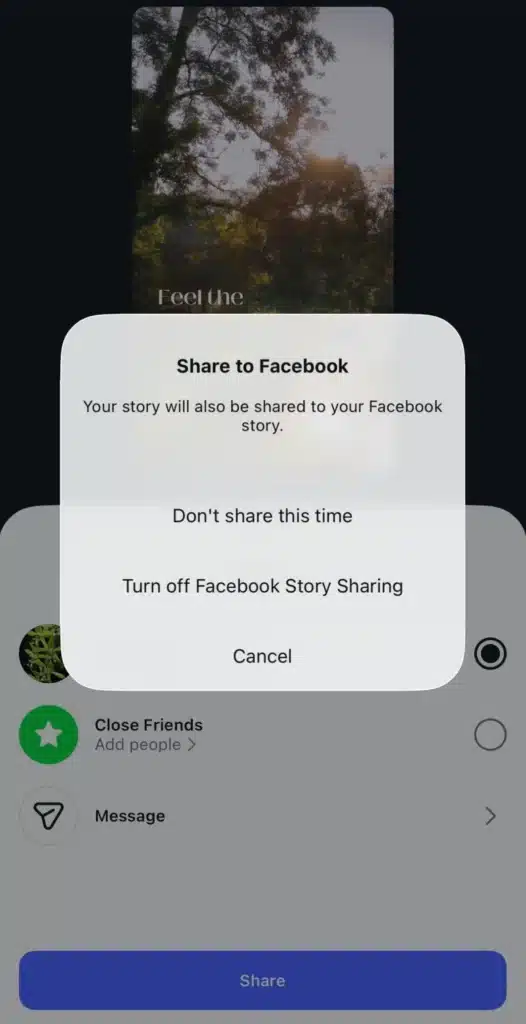
- If you don’t want to post on Facebook, tap “And Facebook Story” under “Your Story,” choose “Don’t share this time,” and then tap “Share.”

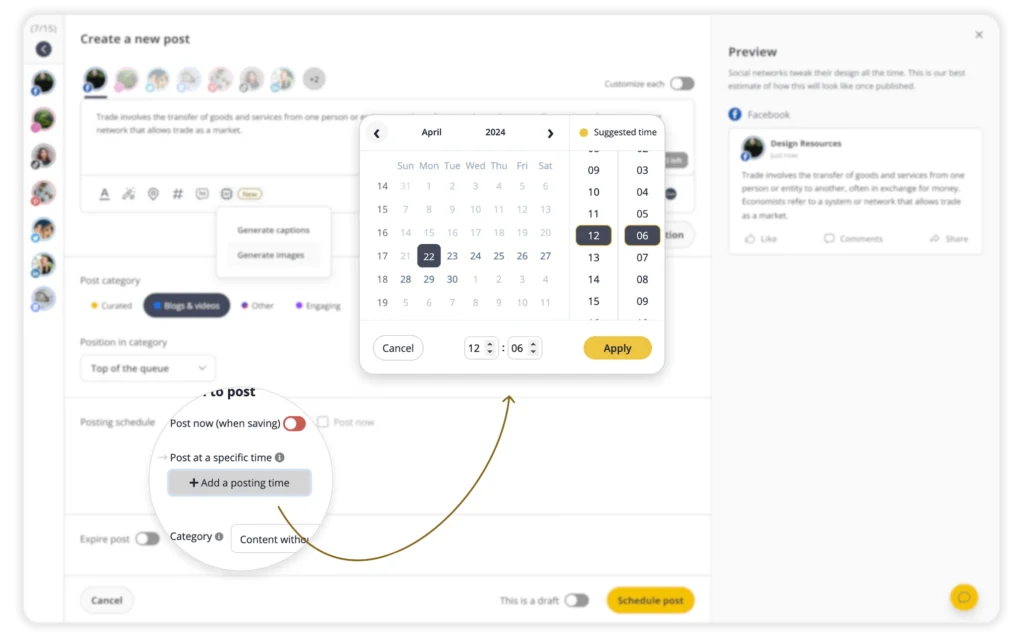
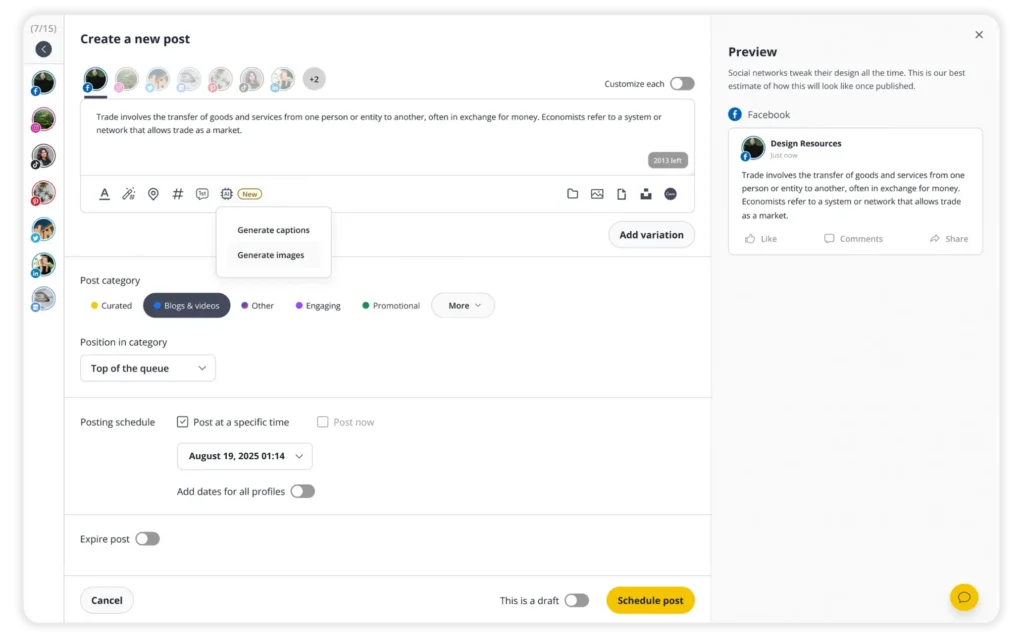
How to post to Facebook and Instagram at once
If you’re posting natively through Facebook or Instagram, you’re constantly switching between apps, rewriting captions, and manually publishing in real time.
With SocialBee, you can schedule feed posts, Reels, Stories, carousels, and even collaborative posts for Instagram, while publishing to Facebook at the same time from one dashboard.
You can plan posts for your personal Facebook profile, Facebook Pages, and both personal and business Instagram accounts, so everything stays organized without switching between platforms or accounts.