
Social media publishing gets exhausting when every post feels like a new task. You sit down to write something for LinkedIn, realize Instagram hasn’t been updated in days, remember there’s a product announcement coming up, and suddenly your entire morning is spent figuring out what to publish.
A repeatable publishing workflow helps you get ahead of that cycle. You decide how often to post, organize your content into categories, create social posts in batches, and schedule them before the week gets busy.
The best part is that you don’t need an elaborate system and multiple social media publishing tools to make it work. In this guide, I’ll show you how to build a publishing routine that fits your business, keeps your content organized, and leaves enough flexibility for everything you can’t plan in advance.
We’re SocialBee LABS SRL, part of WebPros. We use the information you provide to share relevant content & updates, as outlined in our Privacy Policy. You can opt out anytime.
Short summary
- Choose how often to post on each platform. Check posting frequency benchmarks, then decide how many posts you can realistically create each week.
- Pick your main content topics and plan your week. Decide which days to share educational posts, product updates, customer stories, and other content on each platform.
- Keep track of ideas and create content in batches. Save post ideas as they come up, then group similar tasks together when creating content.
- Adapt posts for each platform. Resize images, adjust captions and hashtags, add alt text, and check platform-specific settings before scheduling.
- Check your posts before they go live. Review your calendar for missing posts or repeated topics, fix mistakes, and get approvals from your team or clients.
- Schedule posts based on when they need to go live. Use recurring posting times for regular content and specific dates for launches, events, and announcements.
- Check your schedule regularly and fix what’s not working. Make sure next week’s posts are ready, find out what’s causing delays, and change how you handle tasks that keep taking too long.
What is a repeatable publishing workflow?
A repeatable social media publishing workflow is a process you follow each time you create and share content. It includes coming up with post ideas, creating posts, reviewing them, and scheduling or publishing them.
The goal is to know what needs to be done, when to do it, and who’s responsible, so you’re not figuring things out from scratch every week.
How to build a repeatable publishing workflow
The easiest way to start is to make a few decisions about what you’ll publish, when you’ll create it, and how you’ll get it live.
Here’s how I’d set it up:
- Decide how often to post on each platform
- Choose the topics you’ll post about regularly
- Create a weekly posting schedule for each platform
- Keep a list of content ideas you can use later
- Create similar posts together
- Prepare each post for the platforms where you’ll share it
- Check your posts and review the full calendar
- Schedule your posts instead of publishing them manually
- Check that next week’s content is ready
- Change the system when it stops working
1. Decide how often to post on each platform
How often you should post on social media depends on the platform, your audience, and how much content you can create without sacrificing quality.
Posting every day might work for a business that has someone dedicated to social media. But for a small team creating content alongside other responsibilities, three good posts a week may be a better place to start.
Here are some posting frequency benchmarks to help you decide:
Platform | Suggested posting frequency |
3–7 posts per week | |
1–2 posts per day | |
3–5 posts per week | |
X (Twitter) | Up to 15 posts per day |
Around 3 Pins per day | |
TikTok | 2–3 posts per day |
YouTube | 2–3 videos per week |
Google Business Profile | Up to 1 post per day |
I would start at the lower end of the range for your main platforms and build from there. A business posting three times a week on LinkedIn and four times on Instagram already has seven posts to prepare, even before accounting for videos, graphics, and other tasks.
The best posting frequency is one you can maintain while still giving every post enough attention.
2. Choose the topics you’ll post about regularly
Coming up with new ideas every week for your social media strategy gets tiring. Pick four or five topics your business can talk about regularly, then build different posts around them.
Here are some topics worth considering:
- Educational content: Tutorials, useful tips, and common mistakes.
- Products or services: Product demonstrations, new features, and answers to buying questions.
- Customer stories: Reviews, testimonials, and customer results.
- Company updates: Announcements, upcoming events, and behind-the-scenes content.
- Community content: Questions, polls, and user-generated content.
Choose topics that give you enough material to keep posting. A software company, for instance, could regularly share product tutorials, customer questions, feature updates, and tips related to the problems its product solves.
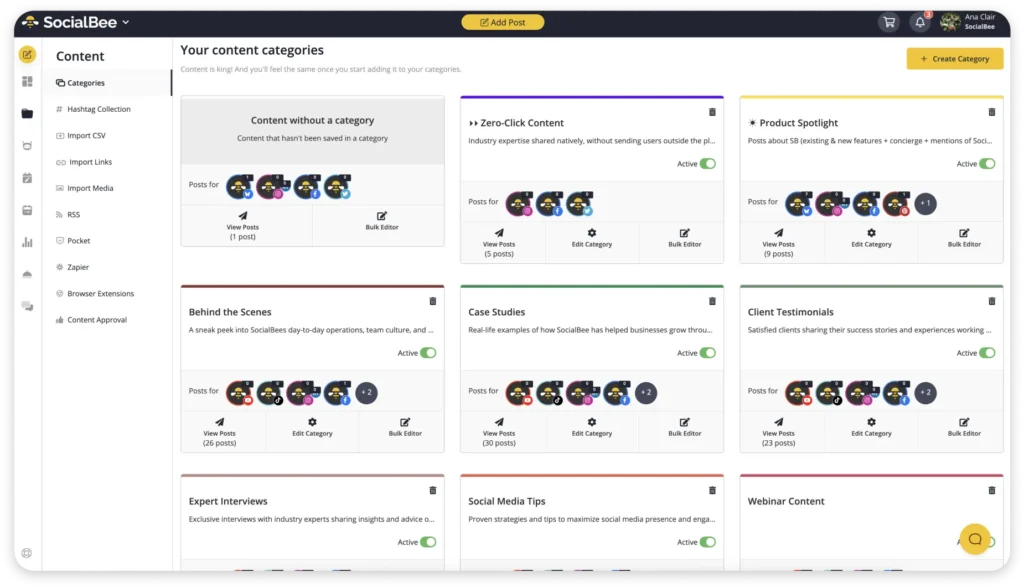
For SocialBee users, Content Categories are a way to organize these posts. Create a separate category for each topic, then add relevant posts to it as you create them.
3. Create a weekly posting schedule for each platform
Now it’s time to decide which days you’ll post on each social network.
Start with the posting frequency you chose in step 1. Then, spread those posts across the week rather than publishing several on one day and disappearing for the rest of it.
Here’s what a schedule for a business posting on Instagram and LinkedIn could look like:
Day | Instagram posts | LinkedIn posts |
Monday | Educational carousel | Industry tip |
Tuesday | Product Reel | — |
Wednesday | Behind-the-scenes post | Customer story |
Thursday | Educational carousel | — |
Friday | Customer testimonial | Company update |
This gives Instagram five posts and LinkedIn three, with different content planned for each platform.
Pay attention to how your posts are spaced out, too. Three promotional posts in a row can feel repetitive, even when they’re about different products. Mix them with useful advice, customer stories, or entertaining content.
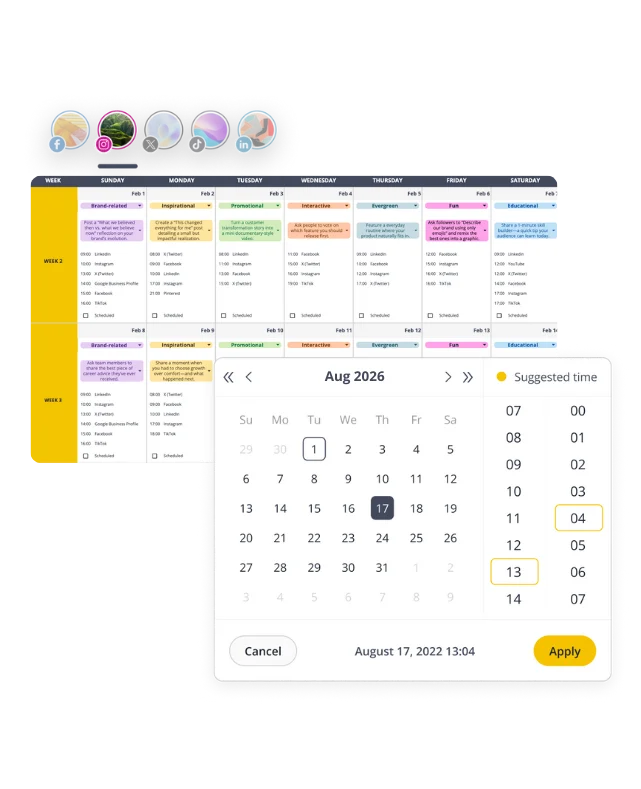
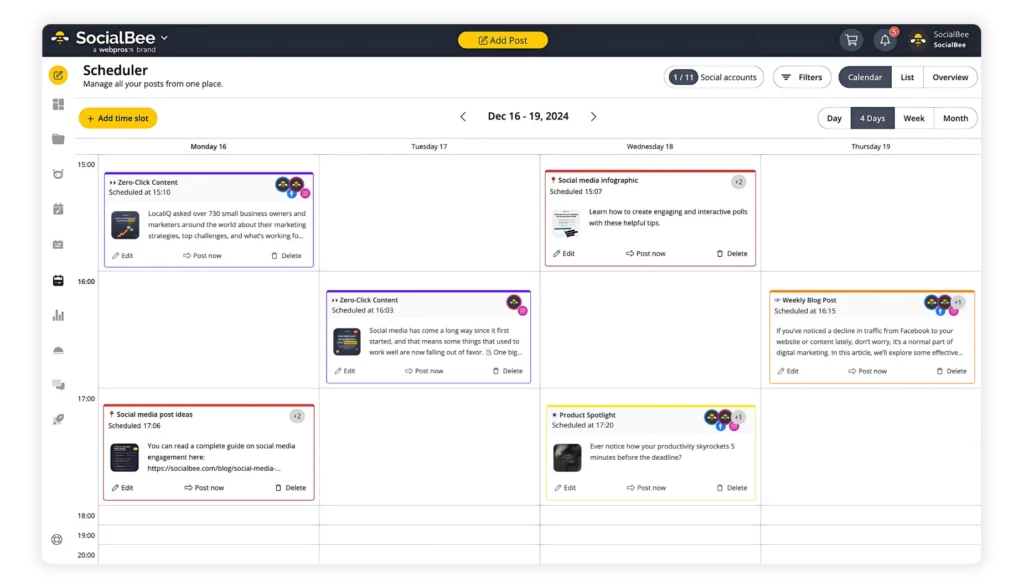
In SocialBee, choose how often each category appears in your posting schedule. That means you could schedule educational content twice a week and customer stories once a week, then add new posts to those categories as they’re ready.
4. Keep a list of content ideas you can use later
Good post ideas rarely arrive exactly when you’re sitting down to write.
Keep a running list in a Google Doc, spreadsheet, or whatever tool you already use. Organize ideas by topic so you know where to look when it’s time to create something.
A few places worth checking regularly:
- Customer questions: Turn common questions from emails, comments, and sales calls into posts.
- Website content: Pull tips, statistics, and explanations from existing blog articles.
- Product updates: Explain what’s new and how customers might use it.
- Previous posts: Revisit questions or topics that received plenty of comments.
- Industry news: Save relevant developments that deserve your perspective.
Write down the actual idea, not just a vague topic.
For instance, “Instagram tips” won’t help much when you return to it next week. “Three reasons Instagram Reels get views but few profile visits” gives you something specific to write about.
Keep the list updated as ideas come in, and choose what to create during your next content session.
5. Create similar posts together
Creating social media content takes less time when you finish similar tasks together rather than switching between writing, designing, and filming throughout the day.
Here’s how to organize a content creation session:
- Write your captions: Draft captions for all the posts you’ve planned, using your saved ideas and research.
- Design your visuals: Create the graphics and carousels you’ll need, reusing templates where possible.
- Record your videos: Film several clips while your camera, lighting, and other equipment are set up.
- Edit your content: Check captions, edit videos, and make sure your visuals are ready to publish.
You don’t have to finish every post in one sitting. You could write captions on Monday, design graphics on Tuesday, and record videos on Wednesday.
For videos and other content that takes longer to produce, recording or creating a few extra pieces while you’re already working on them can save time later.
6. Prepare each post for the platforms where you’ll share it
When sharing a post on multiple platforms, prepare all its versions at the same time. That means adjusting the captions, visuals, and other details for each network before moving on to the next post.
Here’s what to check for each platform:
- Image size: Resize images to fit each platform’s recommended dimensions. For Instagram feed posts, a portrait image might work better than a square one.
- Caption length: Shorten longer captions for platforms like X, where character limits are stricter. Keep the most important information and remove anything that doesn’t add value.
- Hashtags: Choose hashtags that are relevant to the platform and your audience. The same set won’t necessarily work everywhere.
- Links: Add clickable links on platforms like LinkedIn and Facebook. For Instagram feed posts, direct people to your bio link when needed.
- Alt text: Write descriptions of your images so people using screen readers can understand the visual content. Include important text or details shown in the image.
- Platform-specific features: Check whether your post would work better as an Instagram carousel, a LinkedIn document post, or a Pinterest Pin. Also review any account tags, location tags, or other settings available on each platform.
Before finishing the post, check that every version has the right caption, visuals, links, and settings. This saves you from having to reopen the same post several times to finish the edits.
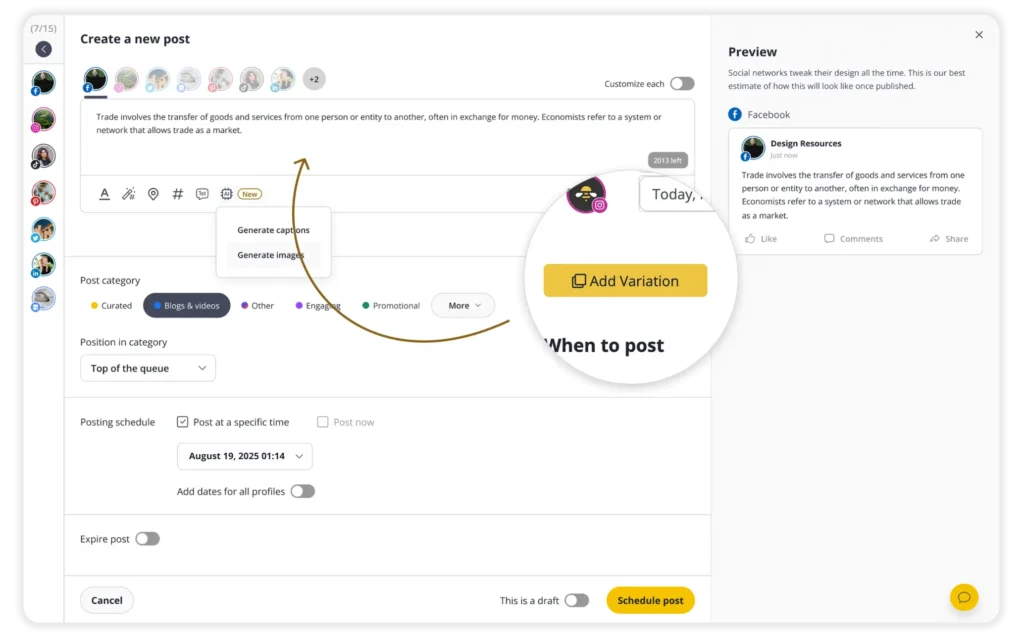
With SocialBee, you can create a post once and customize it for each platform without starting from scratch. Adjust captions, visuals, hashtags, and platform-specific settings, or use AI to generate variations. This way, you can prepare all your posts in one go and schedule them when you’re ready.
7. Check your posts and review the full calendar
Before scheduling a week’s worth of content, look at the posts together. A caption might be perfectly fine on its own but feel repetitive next to three other posts covering the same subject.
Open your content calendar and check:
- Topic variety: Are several posts covering nearly identical ideas?
- Content formats: Have you planned five graphics in a row when your audience also responds well to videos?
- Important dates: Are product launches, events, and announcements included?
- Missing content: Are there any days when you intended to publish but haven’t prepared a post?
Then review the posts themselves. Check spelling, links, image quality, dates, and any claims that need verification.
For teams, this is also the point to get posts approved before they’re scheduled.
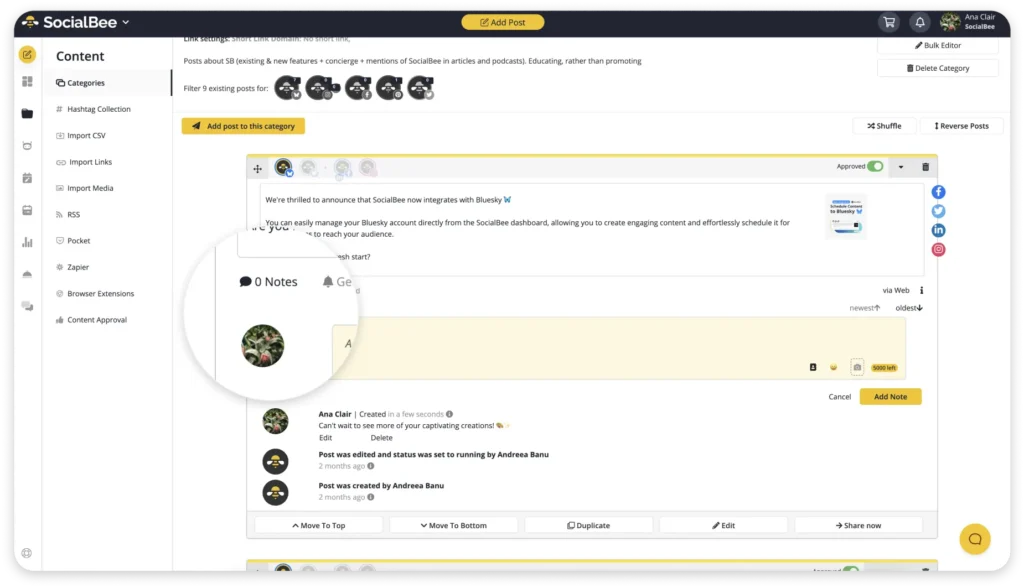
SocialBee’s visual calendar shows your planned content across your accounts, so you can check what’s coming up and spot gaps or repeated topics. Team members and clients can also leave notes on individual posts when something needs editing.
8. Schedule your posts for the right days and times
There are two ways to schedule your content, depending on what you’re posting:
1. Set recurring posting times for regular content.
For posts you share every week, such as educational tips or customer stories, choose recurring days and times. That way, you won’t have to schedule every LinkedIn post or Instagram update individually.
2. Schedule one-off posts for specific dates.
Product launches, special offers, holiday announcements, and event reminders should go out on the dates that matter. Schedule these separately so they don’t get mixed up with your regular posts.
Choose posting times based on your audience.
Check your platform analytics to see when your followers are active and which posting times have worked well in the past. Try different times over a few weeks to see whether certain days or hours consistently bring better results.
Don’t fill your entire calendar weeks in advance, either. Keep a few dates open for last-minute announcements, relevant news, or posts you hadn’t planned.
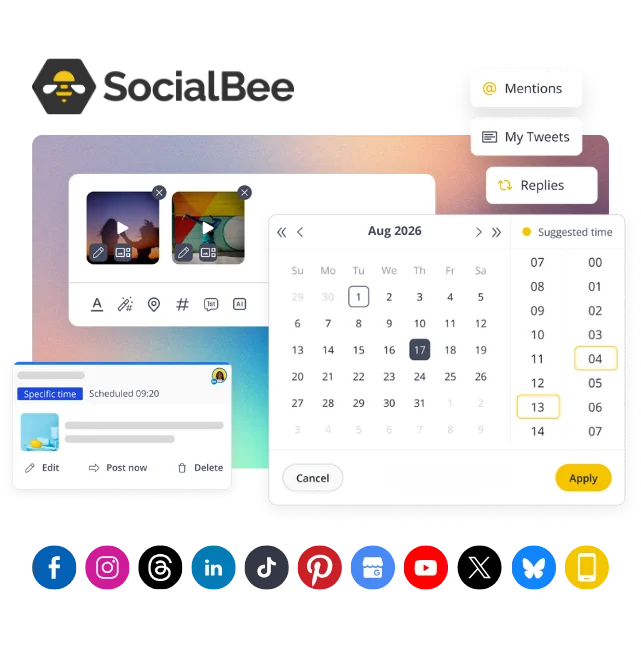
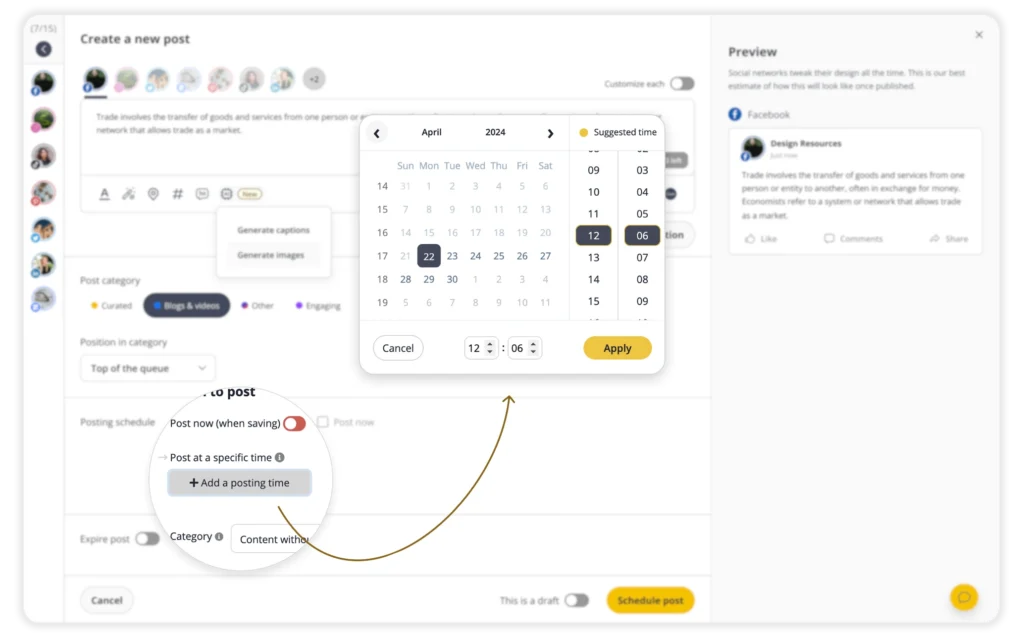
SocialBee lets you set recurring posting times or schedule individual posts for specific dates. It also offers best-time-to-post suggestions based on previous performance, so you have a better idea of when to publish.
9. Check that next week’s content is ready
Set aside 15–30 minutes at the end of each week to check what’s coming up. Friday is a good choice because there’s still time to fix anything that’s missing before Monday.
Here’s what to look for:
- Unfinished posts: Check whether any captions, visuals, or links are still missing.
- Pending approvals: Follow up on posts that are waiting for feedback from your team or clients.
- Upcoming events and campaigns: Make sure everything is ready for next week’s promotions, events, or social media campaigns.
- Outdated information: Check whether any scheduled posts mention dates, offers, or product details that have changed.
Keep this check short and focused on anything that could prevent a post from going out as planned. Anything that needs more work can go on your task list for the following week.
10. Change your approach when it stops working
Even a well-planned posting schedule can become difficult to keep up with. When the same problems keep coming up, figure out what’s causing them.
Maybe posts are always finished at the last minute, approvals take several days, or creating content takes longer than expected. Look at where things get stuck. Setting earlier deadlines, changing who handles certain tasks, or simplifying how you create posts might solve the problem.
Check whether the time you’re spending on content is paying off, too. A video that takes hours to produce might not be worth the effort if a simple carousel gets better results.
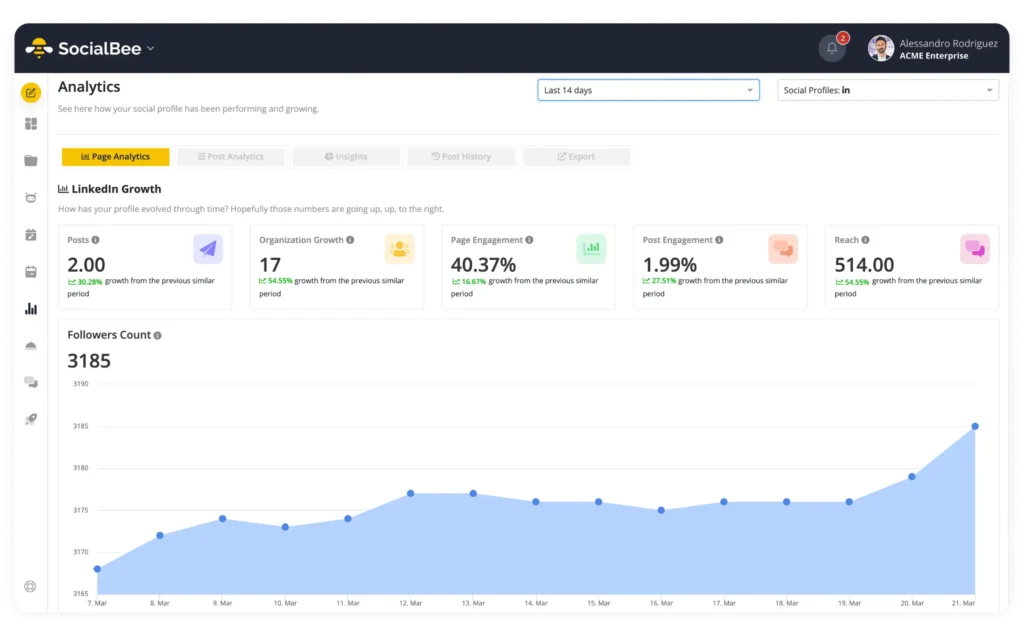
SocialBee’s analytics can help you spot posts that aren’t performing well, so you can stop spending so much time on content that brings little engagement and focus on what your audience responds to.
Focus on fixing the parts that keep causing trouble. There’s no reason to redo your entire process when changing one or two things could be enough.
How SocialBee helps you build a repeatable publishing workflow
Here’s how I’d set my social media publishing workflow up in SocialBee:
- I start by connecting the social media accounts I want to manage. If I’m working with multiple brands or clients, I organize their accounts into separate workspaces. That way, each business has its own content and publishing schedule, and there’s less risk of posting something to the wrong account. This is one of the most useful features for social media managers.
- Next, I create my Content Categories. I usually start with a few broad groups, such as Educational, Product, Customer Stories, and Community. I want an easy way to organize posts based on what they’re about and why I’m publishing them.
- Then I set up recurring publishing slots for each category. I can create different schedules for each social media platform, depending on how frequently I want to publish there. Once that’s done, I won’t have to choose a new publishing date for every post.
- When it’s time to create content, I work through my categories in batches. I choose several ideas from my backlog and start preparing captions and visuals. If I need help getting started, I can use SocialBee’s AI content generator to draft captions or create images, then edit everything to match the brand’s voice.
- I prepare platform-specific versions before scheduling. If a post belongs on LinkedIn, Facebook, and Instagram, I customize the caption and media for each network. SocialBee lets me manage those variations together, and I can use AI to generate alternative captions when I need them.
- Once the posts are ready, I open the visual calendar. I check the entire week to make sure the topics are balanced, promotional content isn’t clustered together, and there are no unexpected gaps. If I’m working with a team or client, I use SocialBee’s collaboration and approval features to collect feedback before publishing.
- Then I add the approved posts to their categories and let the schedule do its job. SocialBee uses the recurring publishing slots I’ve already created, so I don’t need to manually schedule every post. For announcements or events that need to go live on a particular date, I schedule those separately.
- At the end of the week, I check what’s coming up next. I look for categories that need more content, unfinished drafts, and any changes to upcoming campaigns. Most of the publishing structure is already there, so I’m mainly adding the next batch of posts.
- Finally, I review performance and make adjustments. I use SocialBee’s analytics to see which posts and topics are getting the best results. I also check its best-time-to-post suggestions to see whether I should change any publishing slots. If a category isn’t working or the schedule is becoming too demanding, I update it rather than continuing with the same plan.
The part I find most useful is that the categories and recurring schedules stay in place from one week to the next. Once you’ve set them up, most of your time goes into preparing better content instead of repeatedly organizing when and where to publish it.
What does a repeatable social media publishing workflow look like?
Here’s how you could organize your social media tasks throughout the week:
When | What to do |
Throughout the week | Save new post ideas as they come up |
Monday | Choose which ideas to turn into posts |
Tuesday | Write captions and create visuals |
Wednesday | Prepare each post for the platforms where you’ll share it |
Thursday | Check posts for mistakes and get approvals |
Friday | Check that next week’s posts are scheduled and ready |
Once a month | Check what’s slowing you down and whether your content is getting results |
This is one way to divide the work. The days matter less than knowing when each task needs to get done.
Frequently asked questions
1. How far in advance should you plan social media content?
One to four weeks is a reasonable starting point. Plan content with predictable dates, such as promotions and events, further ahead. Posts about current news or trends are better prepared closer to publication.
2. Should you use the same publishing schedule on every social media platform?
No. Each platform can have a different posting frequency and content mix. Base your schedule on where your audience is most active, which formats work well, and how much content you can produce.
3. How much room should you leave for spontaneous social media posts?
There’s no fixed percentage. Businesses that regularly comment on news or trends may need to change their schedules more often. Keep the option to move or replace scheduled posts when something important comes up.
4. How often should you change your social media content categories?
Check your content topics every month or quarter. Consider replacing a topic when you consistently struggle to find ideas for it, your audience shows little interest, or it no longer relates to what your business offers.
5. Is it better to schedule social media content weekly or monthly?
Monthly planning works well for campaigns, promotions, and content that requires more preparation. Weekly scheduling gives you more control over individual posts, especially when your business shares frequent updates. Many businesses use both.
Make publishing a routine instead of a daily decision
You shouldn’t have to start from scratch every time you need to publish social posts.
Once you’ve decided what types of content to share, how often to post, and when to prepare everything, most of the daily guesswork disappears, and you can focus your effort elsewhere.
My advice is to start small. Choose a few content categories, create a weekly schedule you can maintain, and get into the habit of preparing posts before you need them. You can add more content, platforms, or team members once the data shows your process is working.
And if you want to make social media scheduling easier, SocialBee can help you put the whole routine together. Start your 14-day SocialBee trial to organize posts into categories, create recurring publishing schedules, prepare content for multiple platforms, and let automatic publishing take care of the rest.