
The content creation workflow that works for me today looks nothing like the chaotic process I started with years ago. Back then, my content creation process depended on scattered docs, endless feedback loops, and way too many manual tasks. The bigger the content volume got, the harder it became to maintain consistent quality.
What changed everything was building a clear, repeatable content workflow with defined stages, better collaboration, and the right automation tools. Instead of constantly reacting, my content marketing team finally had a system for creating blog articles, social media posts, and other content formats without losing track of deadlines or brand voice.
In this article, I’ll break down the exact content production process I use today, including the project management tools, AI tools, and approval systems that helped me create content more efficiently at scale.
We’re SocialBee LABS SRL, part of WebPros. We use the information you provide to share relevant content and product updates, as outlined in our Privacy Policy. You can opt out anytime.
Short summary
- Content creation becomes much easier once you stop relying on inspiration and build a repeatable system around planning, creation, approvals, scheduling, and analytics.
- Content pillars help you stay consistent, brainstorm faster, and organize posts into categories that support your larger content marketing strategy.
- Batching captions, visuals, and platform-specific content reduces context switching and saves hours of repetitive work every week.
- Keeping feedback, approvals, and internal notes connected to the actual post prevents messy revision cycles and scattered communication.
- Scheduling content ahead of time removes daily posting pressure and helps maintain consistent quality across platforms.
- Tracking analytics regularly helps you identify which topics, formats, and posts actually perform well so you can create smarter content over time and make data-driven decisions.
- SocialBee helps centralize the entire process by combining content categories, scheduling, approvals, calendar planning, AI tools, and analytics in one place.
What is a content creation workflow?
A content creation workflow is the system a social media team follows to plan, create, review, publish, and manage content from start to finish. It outlines the key stages of the content creation journey, assigns responsibilities, and keeps content projects moving without confusion or missed deadlines.
Without a clear content workflow, things fall apart quickly. Feedback gets buried in Slack threads, blog articles sit waiting for approval, and social media posts go live late or with mistakes, making quality control much more difficult. As content volume grows, those small issues compound fast and start affecting consistent quality, team morale, and even brand loyalty.
A well-defined system creates structure around the creative process. Everyone knows their role, where assets live, what stage a project is in, and what happens next.
Content production usually includes:
- Brainstorming ideas and keyword research
- Assigning specific tasks to the right team member or department
- Writing and editing content
- Gathering feedback and handling approvals
- Publishing content across different platforms
- Tracking performance and improving future content marketing efforts
Some teams use simple task-based workflows, while others rely on status-based workflows and automation tools to handle larger content goals. The right setup depends on your team’s process, content formats, and how often you publish.
What broke my content process for years
1. I treated content like inspiration instead of operations
For a long time, my content creation process depended on whether I “felt creative” that day. If inspiration hit, I’d write three LinkedIn posts in one sitting. If it didn’t, the entire writing process stalled.
That approach worked when content creation was occasional. It completely fell apart once I had deadlines, clients, multiple social platforms, and a growing content calendar to manage. I needed a repeatable process, not random bursts of motivation.
2. I created every post from scratch
I used to rebuild everything every single time.
New outlines. New caption structures. New processes. New brainstorming sessions for content ideas I’d already explored before. Instead of creating systems and reusable building blocks, I treated every piece of content like a completely new project.
It slowed down content production massively and made scaling impossible.
3. I switched between strategy, writing, editing, and publishing all day
My workdays were chaotic because I never separated workflow stages.
I’d start with keyword research, jump into content writing, stop to review client feedback, switch to scheduling posts, then come back to editing content hours later. I constantly context-switched between creative and operational tasks.
By the end of the day, I felt busy, but the final output rarely reflected the amount of time I spent working.
4. I spent more time deciding what to post than actually creating
This was probably the biggest hidden problem.
I wasted hours debating content formats, target audience angles, publishing times, and which social media posts deserved priority. Without a clear content marketing strategy or editorial calendar, every decision felt urgent.
The mental load of deciding what to create became heavier than the actual content creation itself.
5. I didn’t have clear boundaries around revisions and client feedback
Feedback loops were endless because nobody defined what “done” actually meant.
One revision became three. Then five. Comments came through email, Slack, voice notes, and Google Docs. Sometimes multiple departments gave conflicting feedback at the same time, including legal reviewers and project managers.
6. I wasted hours on repetitive work
The amount of manual tasks in my old workflow was honestly embarrassing.
Copy-pasting posts into different social media platforms. Updating spreadsheets manually. Chasing approvals. Rewriting the same social media posts for different channels from scratch.
Most of my energy went into repetitive time-consuming tasks instead of trying to deliver high-quality content and leaving that to artificial intelligence and management platforms.
My step-by-step content creation workflow
This is the exact structured content creation workflow I use to manage blog articles, social media posts, and larger content projects without feeling buried in manual tasks all week. It’s not overly complicated, and that’s exactly why it works.
The biggest difference between my old workflow and my current one is that every stage now has a clear purpose. I know when I’m planning, when I’m creating, when I’m reviewing, and when I’m publishing.
Here’s how the entire content process works from start to finish:
- Phase A: Setup and content foundation
1. Define your content goals and platforms
2. Set your content pillars to guide everything you create
- Phase B: Content planning and organization
3. Group content into batches based on format or platform
4. Create a simple content calendar to stay organized
5. Customize content for each platform without starting from scratch
- Phase C: Content review and collaboration
6. Prepare content batches for review
7. Collect feedback in one place to avoid confusion
8. Finalize content without endless revisions
- Phase D: Scheduling and publishing
9. Schedule all your content in advance across platforms
10. Keep a buffer of ready-to-post content
- Phase E: Monitoring and improving your content
11. Track performance across your posts
12. Double down on top-performing formats and ideas
Phase A: Setup and content foundation
1. Define your content goals and platforms
Before you create content, you need to know what the content is supposed to do.
That sounds obvious, but most teams skip this step entirely. They publish content because the content calendar says they should, not because the content supports a larger content marketing strategy.
Now, before creating anything, I define:
- The goal of the content
- The target audience
- The platforms the content will live on
- The action I want potential customers to take
For example, a LinkedIn post designed to generate leads should look completely different from a TikTok video built for reach or an SEO-focused blog post targeting search engines.
This step also helped me stop posting everywhere just because I “should.” Different platforms reward different formats, publishing styles, and audience behaviors. Trying to create for every channel at once stretched my team too thin and lowered overall quality.
Now, I focus only on the social platforms that actually support our business goals.
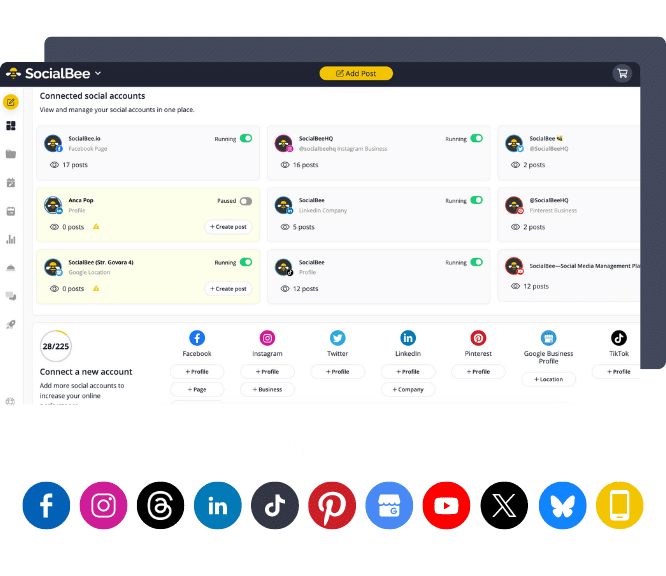
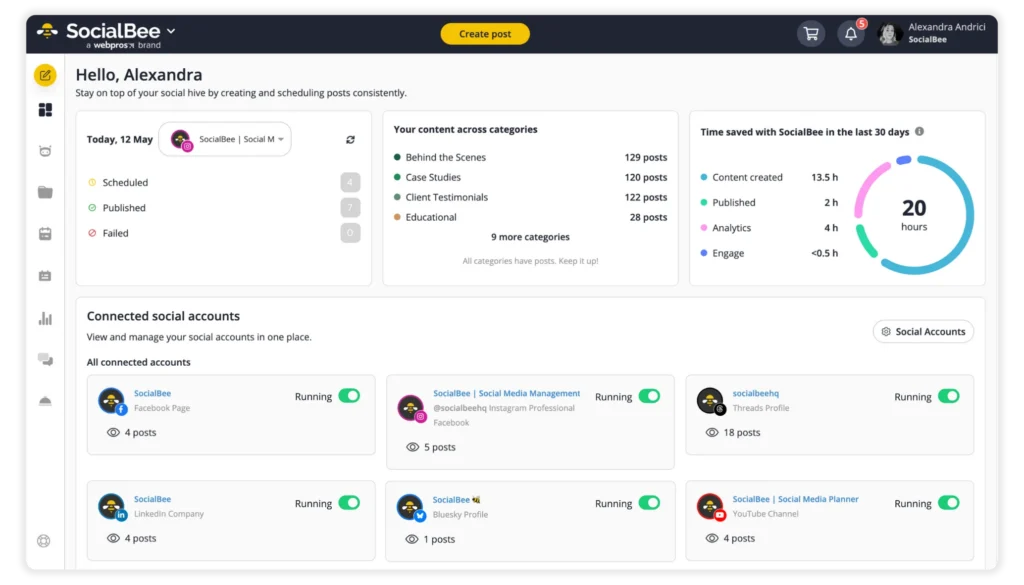
One thing that made this much easier was using SocialBee as the central hub for planning and scheduling content across platforms. Instead of juggling different tools and repetitive tasks for LinkedIn, Instagram, X, and other social media sites, we could manage everything from one dashboard and keep the entire marketing team on the same page.
2. Set your content pillars to guide everything you create
Content pillars completely changed the way I approach writing and visual content creation.
Before using them, I spent way too much time deciding what to post. Every new piece of content felt like starting from zero. Once I defined a few clear content pillars, the creative process became dramatically easier.
Content pillars are simply recurring topic categories your brand consistently talks about.
For example, a marketing brand might focus on:
- Social media strategy
- Content creation tips
- Case studies
- Behind-the-scenes workflows
- Industry trends
These pillars became much easier to manage once I started organizing them into SocialBee’s content categories.
Inside SocialBee, each category acts like its own content bucket with a separate posting schedule attached to it. For example, educational posts might publish on Mondays, Wednesdays, and Fridays, while promotional posts only go out once a week. That means I’m not manually deciding what type of content to publish every day because the structure for my content distribution already exists inside the calendar.
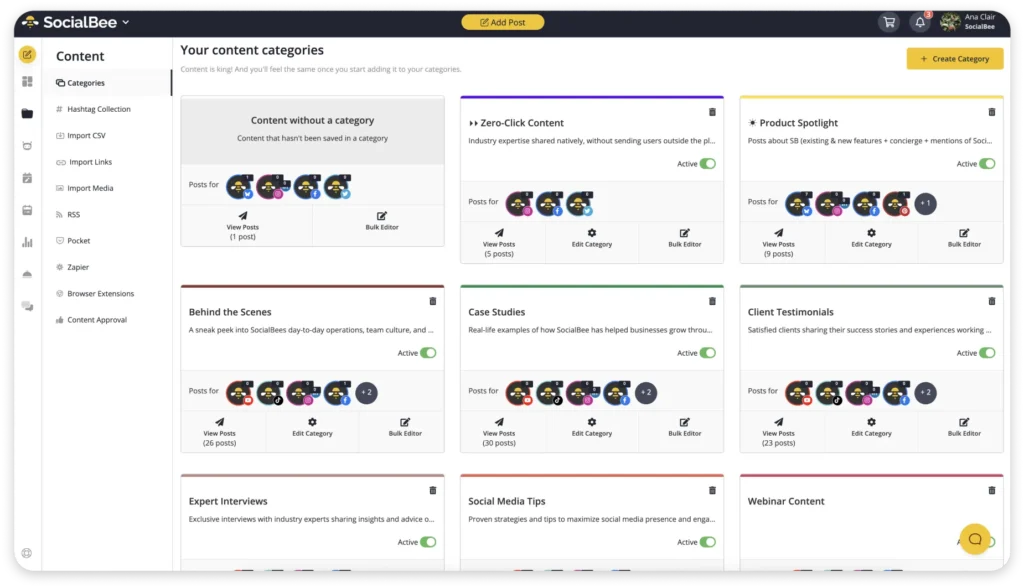
It also creates a much healthier content mix automatically, and can be of great help in an AI-powered content workflows.
Instead of accidentally posting too much promotional content in a row or neglecting certain topics entirely, the categories keep everything balanced across the week.
Phase B: Content planning and organization
3. Group content into batches based on format or platform
One of the biggest reasons my old content workflow felt exhausting was because every task competed for attention at the same time.
I’d start writing a blog post, stop halfway through to review Instagram captions, switch to editing visuals, then suddenly remember I still hadn’t scheduled tomorrow’s social media posts. The entire day felt fragmented. Even simple tasks took longer because my brain never stayed focused long enough to build momentum.
Batching fixed that almost immediately.
Now I try to keep similar work together. If I’m in writing mode, I stay there for a few hours and knock out multiple captions, outlines, or blog sections in one sitting. If I’m reviewing content, I handle approvals and feedback all at once instead of interrupting the creative process every 20 minutes.
What surprised me most was how much easier content creation became once I stopped constantly switching contexts. Ideas connected faster. My writing sounded more consistent. And the work felt lighter because I wasn’t mentally restarting all day long.
This also made collaboration easier for the marketing team. Designers knew when content batches were ready. Editors weren’t chasing unfinished drafts. Everyone stayed on the same page because the workflow finally had rhythm instead of chaos.
4. Create a simple content calendar to stay organized
For a long time, my “content calendar” lived almost entirely in my head.
I thought that gave me flexibility, but honestly, it just created stress. I was always trying to remember what needed to go out next, which platforms were missing content, and whether a campaign was actually finished or still waiting on feedback.
Once I started planning content visually, everything became easier to manage.
I didn’t need a massive system with complicated workflow stages or endless status labels. I just needed a clear overview of what was being published, when it was going live, and what still needed work.
That visibility changed how I approached content production. Instead of reacting day by day, I could plan ahead, balance different content formats, and avoid cramming everything into the last minute.
I also noticed that content quality improved when the schedule stopped feeling rushed. There’s a huge difference between intentionally publishing content and panic-posting because the calendar is empty.
I use SocialBee to plan content ahead. Once my content batches are ready, I schedule the posts directly inside the calendar and organize them by publishing date, so I always know what’s going out and when.
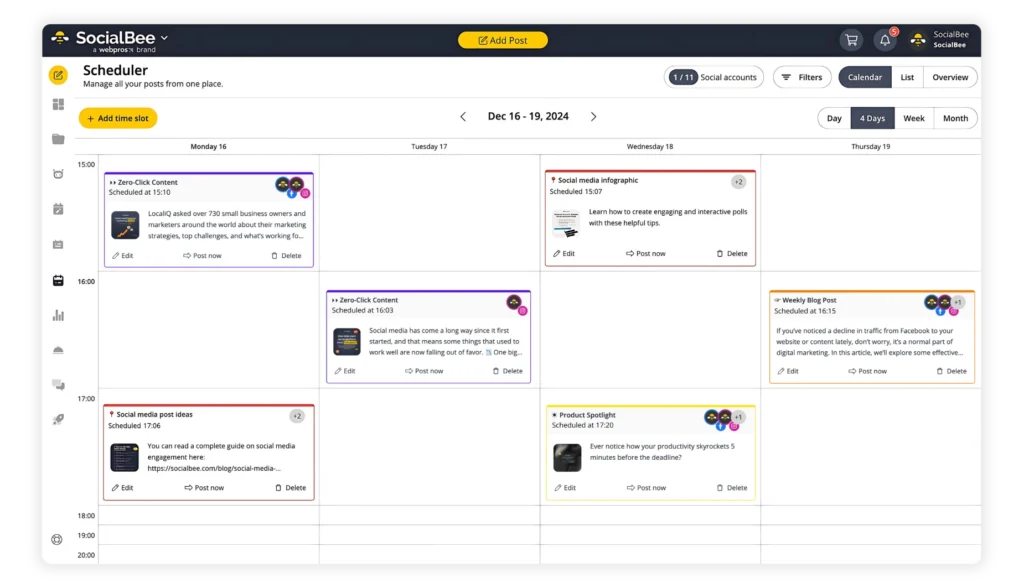
What makes the workflow easier is seeing the entire publishing schedule in one place. If there’s a week with too much promotional content or a gap where nothing is scheduled, I notice it immediately before it becomes a problem.
5. Customize content for each platform without starting from scratch
For a long time, I thought cross-platform content meant copying and pasting the exact same post everywhere.
Then I overcorrected and started rebuilding every post from zero for each platform.
Neither approach worked.
What works better is creating one strong version of the content first, then adapting it based on how people consume content on each platform.
A LinkedIn post usually needs more context and a slower build-up. Instagram captions need to get to the point faster. Short-form platforms reward stronger hooks immediately. The format changes, but the core idea stays the same.
That shift made content production much more manageable because I wasn’t multiplying the workload every time content needed to appear on another channel.
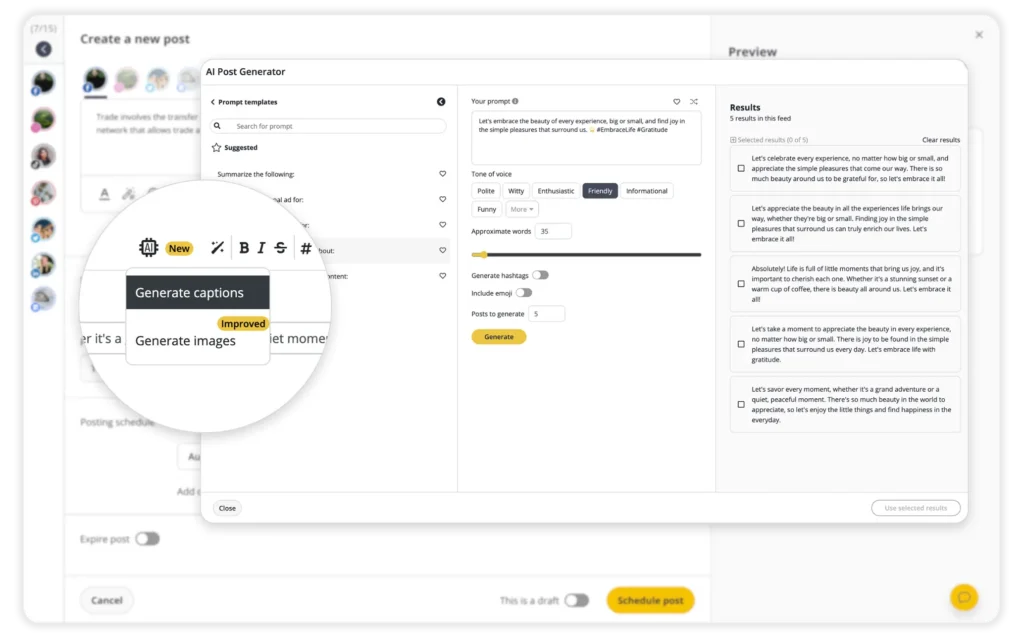
Inside SocialBee, I can create a base post inside the editor, generate variations for different platforms, adjust the wording or formatting where needed, and schedule everything from the same place instead of rebuilding posts manually across multiple tools.

Phase C: Content review and collaboration
6. Prepare content batches for review
Sending content for approval one piece at a time will eat up way more of your time than it should.
A caption here. A design there. A blog draft later that afternoon.
It interrupts everyone’s focus and creates a review process that never really ends because new content keeps appearing throughout the day.
I prepare content in batches before sending anything for feedback. If we’re reviewing next week’s social media posts, the full batch goes out together. Same for visuals, blog articles, or campaign assets.
That small change makes collaboration much smoother because reviewers can see the full context of the campaign instead of reacting to isolated pieces of content one by one.
It also reduces last-minute edits because gaps and inconsistencies become easier to spot before publishing.
7. Collect feedback in one place to avoid confusion
My old feedback process was chaotic.
Comments lived in Google Docs, Slack threads, emails, and random screenshots people sent hours later with zero context attached. Sometimes, two people reviewed different versions of the same post without realizing it. Other times, important edits disappeared entirely because feedback was scattered across too many places.
Once the content volume increased, that system completely broke down.
Now I try to keep all feedback attached directly to the content itself. That alone removes a huge amount of confusion from the review process because everyone sees the same version, the same comments, and the same updates.
This is one of the SocialBee features I genuinely rely on during collaboration. The internal notes system lets the team leave feedback directly inside the post before it goes live. Instead of sending Slack messages like “change the CTA on the LinkedIn post” or “legal approved version 2,” the notes stay attached to the actual content.
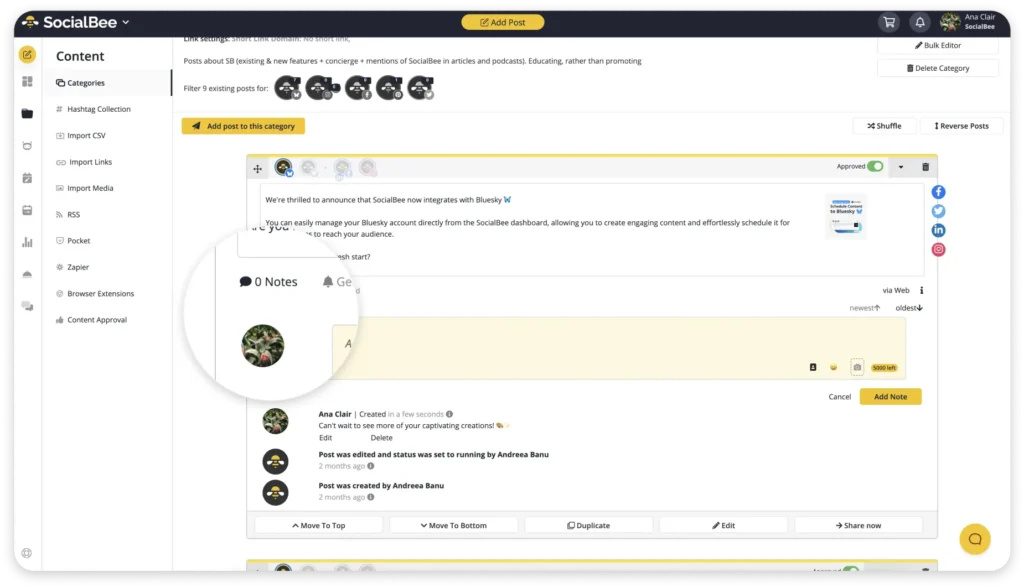
It sounds small, but keeping conversations connected to the post itself made approvals much faster and cut down a lot of unnecessary back-and-forth between writers, designers, project managers, and reviewers.
8. Finalize content without endless revisions
At some point, I realized that endless revisions usually meant the workflow itself was unclear.
Nobody knew who had final approval. Nobody agreed on quality standards. And because expectations weren’t defined early, revisions kept stacking on top of each other until simple content projects dragged on for days.
Now we define revision boundaries before the review process even starts.
That means:
- Clear deadlines for feedback
- Defined approval roles
- Limited revision rounds
- Agreed expectations for the final output
Those boundaries made the process feel significantly lighter because content could actually move forward instead of getting trapped in permanent editing mode.
SocialBee helped here, too, because drafts, approvals, and scheduled posts live inside the same workflow. Instead of chasing updates across multiple tools, the team can immediately see whether content is pending review, approved, or ready to publish.
Phase D: Scheduling and publishing
9. Schedule all your content in advance across platforms
For a long time, publishing content depended entirely on whether I remembered to post it.
That sounds ridiculous now, but a lot of content teams still work like this. Someone finishes a post, leaves it in a folder, and hopes it gets published at the right time later. The problem is that once work gets busy, posting becomes reactive instead of planned.
Scheduling content in advance fixed that immediately.
Now, once a batch is approved, I schedule everything ahead of time so the publishing side of the workflow is already handled before the week even starts. That creates a huge amount of breathing room because content production and content publishing stop competing for attention every day.
I can schedule content with SocialBee for multiple platforms from the same dashboard instead of manually logging into each channel separately. Once posts are added to the queue, the platform handles publishing automatically based on the schedule I’ve already set.
10. Keep a buffer of ready-to-post content
One habit that took away a lot of stress was building a small content buffer.
Before that, every week felt urgent because I was always creating content right before it needed to go live. If something unexpected happened, like a delayed approval, client revision, or busy week, the entire publishing schedule fell apart almost immediately.
Now I try to keep a reserve of approved content ready to publish at all times.
It doesn’t need to be huge. Even having one extra week of scheduled social media posts changes the pace of the workflow completely. Instead of scrambling to fill empty calendar slots, you get enough space to think strategically, test new ideas, and focus on creating better content instead of rushing to keep channels active.
The buffer also helps maintain consistent quality because content has more time for proper review and editing before publishing.
Phase E: Monitoring and improving your content
11. Track performance across your posts
Once content went live, I used to move on to the next batch without paying much attention to what actually happened afterward. Occasionally, I’d check likes or comments, but there wasn’t any real process behind it.
That made it hard to improve because I was creating content based on assumptions instead of patterns.
Now I review analytics consistently across posts to see what people actually respond to. Not just vanity metrics, but things like:
- Which topics generate saves, clicks, or replies
- What hooks keep people reading
- Which content formats perform best on specific platforms
- What posting times consistently lead to stronger engagement
You start noticing trends pretty quickly once you look at content as a system instead of isolated posts.
SocialBee’s analytics made this process much easier because I could actually track post performance without building manual reports every week.
Inside the analytics dashboard, I can see engagement, reach, follower growth, clicks, and post-level performance across platforms in one place. What I find most useful is being able to quickly identify which specific posts are driving results instead of relying on vague overall account metrics.
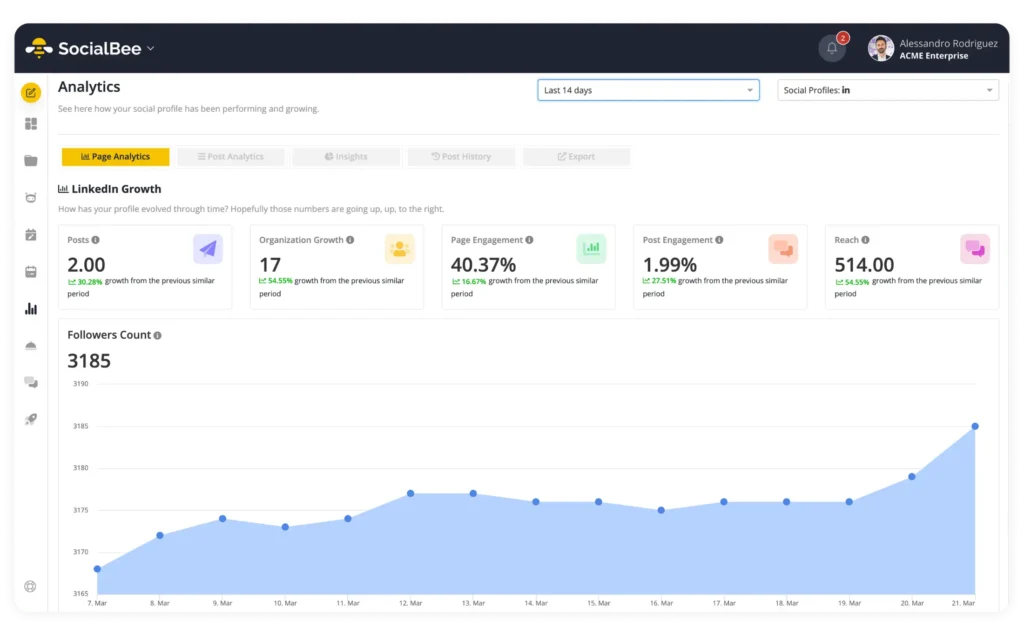
For example, if carousel posts consistently outperform static images on Instagram, or certain LinkedIn topics generate more clicks and comments than others, those patterns become obvious fast. I can also compare performance over time instead of guessing whether the content strategy is actually improving.
When working with clients or teams, the PDF reporting feature also saves a lot of time because I don’t have to manually pull screenshots and metrics from multiple platforms just to explain what’s working.
12. Double down on top-performing formats and ideas
I stopped putting pressure on myself to constantly come up with completely new content ideas.
If a post performs well, I reuse the angle, structure, or format instead of treating it like a one-time success, not by copying the exact post again, but by building on the same idea in different ways. Sometimes, tools that use natural language processing (NLP) to create AI-generated content, like SocialBee’s AI assistant, can be useful for adjusting one idea into multiple posts. That doesn’t mean it should replace human creativity, though, but it can give it a boost.
For example, if a simple “here’s how I do this” post gets more saves and shares than polished promotional content, that tells me something useful. If shorter LinkedIn posts consistently get more engagement than long-form ones, I adjust. If a certain blog post keeps bringing traffic from search engines, I turn it into more content instead of abandoning the topic after one article.
Most of the improvement in my process came from paying attention to patterns like that.
The goal stopped being “create something new every day” and became “figure out what people are actually interested in, then make more of it.”
How I manage my entire content workflow with SocialBee
This is the exact setup I use in SocialBee to keep my AI content workflow organized without turning it into a complicated system I can’t realistically maintain every week:
- I start by connecting all the social accounts I manage and organizing them into separate workspaces. That keeps different brands, clients, or projects separated properly, so content calendars, scheduled posts, and analytics don’t overlap.
- Next, I create content categories based on the pillars we publish around consistently, like educational content, product-focused posts, engagement content, and promotional campaigns. Each category gets its own posting schedule, which means I’m not manually deciding publishing times every time I create a post.
- When I sit down to create content, I batch it directly inside SocialBee. I’ll usually write several posts in one session, sometimes using AI for content, then work on visuals afterward instead of bouncing between tasks constantly. As posts are finished, I immediately add them to the correct category so they’re already connected to the publishing schedule.
- If I’m turning a blog post, newsletter, podcast, or video into social content, I break it into smaller pieces and create several platform-specific posts from the same source material. When I need variations or extra angles, I use SocialBee’s AI assistant to generate alternate captions, hooks, or post ideas without starting from a blank page again (without neglecting human oversight, of course).
- Before scheduling anything, I customize each post for the platform it’s going to. Usually, that means shortening captions, adjusting formatting, changing hooks, removing links where they don’t belong, or rewriting parts of the copy so the content feels native to the platform instead of duplicated everywhere.
- Once the posts are ready, I either add them to their category queue so they publish according to the predefined schedule or I manually choose a date and time for launches, campaigns, or time-sensitive content.
- For collaboration, everything stays inside the workflow. Drafts move through approval before publishing, and internal notes stay attached directly to each post so feedback doesn’t disappear into Slack threads or email chains. That became especially important once more people started reviewing content across different departments.
- Before content goes live, I review the calendar view to see how the week looks overall. It helps me catch things like too many promotional posts grouped together, inconsistent posting frequency, or empty gaps in the schedule before publishing starts.
- After posts are published, I use the analytics tools to review what’s actually performing well. I usually look at engagement, reach, clicks, follower growth, and individual post performance across platforms to figure out which content formats and topics deserve more attention in the next round of manual or AI-assisted content creation.
Frequently asked questions
1. What tools should you use for social media content creation?
Most teams need a few core tools to manage content properly: a design tool like Canva for visuals, a scheduling platform for publishing, a content calendar for planning, and analytics software to track performance data.
The problem is that once content volume increases, jumping between separate tools gets messy fast. That’s why I prefer using SocialBee for most of the operational side of the content management workflow. I can organize content into categories, schedule posts across platforms, collaborate with the team, manage approvals, and track analytics from a single dashboard while still using AI content generation tools or other software for design work.
2. How far in advance should you create social media content?
I’ve found that staying at least two to four weeks ahead makes the workflow much easier to manage. It gives you enough time for revisions, approvals, and unexpected changes without rushing content at the last minute.
Even keeping a small buffer of ready-to-post content reduces a huge amount of stress. AI models and AI-powered tools can help you speed things up, but make sure you keep human oversight.
3. Does scheduling social media content hurt performance?
No, scheduling content does not reduce reach or engagement on its own.
In fact, scheduling often improves performance because it helps you post consistently and publish at better times instead of posting randomly whenever you have time. Tools like SocialBee also help by suggesting optimal posting times based on your past performance, which makes it easier to reach your audience segments with engaging content when they’re actually active.
Build a content creation workflow that lasts
The biggest change in my content process didn’t come from creating more posts. It came from building a system that made content easier to plan, produce, review, and publish consistently.
Once the structure was there, everything else became easier to manage. Content batches stopped feeling chaotic, approvals moved faster, scheduling became predictable, and I wasn’t constantly scrambling for last-minute ideas anymore.
That’s also why SocialBee became part of how I manage content day to day. Instead of juggling separate tools for planning, scheduling, collaboration, and analytics, I could handle everything in one place and keep the entire AI-powered workflow organized.
If your current setup feels scattered or difficult to maintain as content volume grows, it’s time to start your SocialBee 14-day free trial.